Bedding Rifles

The Importance of Bedding Rifles


Some people know where the bedding is located, others have all sorts of ideas about what it does but rare is the person with a good working knowledge about bedding.

Maybe we should start with what it isn’t. It doesn’t cure any of the problems that are anywhere else. When you bed a rifle with a bad barrel, bad crown, crooked chamber or bolt it still has problems. As you will find out when you chase accuracy problems, accuracy doesn’t improve until you fix the last problem. Many customers come in the gun shop seeking miracles in the form of a bedding job. If the gun is shooting huge groups it probably won’t be bedding.

What a good bedding job will do is stabilize groups so that the gun will keep the same zero and sometimes tighten groups that are not round. An example might be the gun that shoots groups 1″ tall and 3″ wide. It might be the barrel settling in a different spot where it touches inside the forend. The real job we ask bedding to do is give the rifle action a perfect fit to the stock in the areas that bear the stress of recoil and attachment. This means behind recoil lugs and under the receiver especially around the guard screws or whatever holds the rifle in the stock. It should be a perfect mirror image of the receiver area and not allow any movement of the receiver but also not place any stress on the receiver. As tough as you might think this receiver is it still can be stressed in such a way that it will affect accuracy. When you consider that a small imperfection can be close to one guard screw, let’s say 1/4 inch behind the front screw. Now the front screw is tightened 50 inch pounds. This causes the rear of the receiver to raise. Now the rear screw is tightened and the receiver bends and flexes as the rear screw with the help of compound leverage from the position of the imperfection and the added effect of the inclined plane of the screw threads put tremendous pressure on the receiver. Don’t forget this was the receiver you labored over for many hours to make sure everything was square and in line. Okay, now you know why you need good bedding!

Let’s look at some of the things that go with synthetic bedding jobs before we start mixing the epoxy! One of the first things to decide will be is this a good idea. Plastic synthetic stocks that are made out of polyethylene plastic are not good candidates for epoxy bedding. This material will not bond with epoxy and the bedding will pop loose from the stock unless anchor holes are drilled in at an angle and these holes filled with the epoxy when applying the bedding. This is a tricky operation because it is hard to force the epoxy into a blind hole without air trapped in the bottom. Much better to discard this stock for a fiberglass or wood stock that will bond with the epoxy.

Next problem is what to do about the barrel and barrel channel. Do you want the barrel to float or touch with some upward pressure? Before you automatically say float the barrel have you ever considered why they build them with the barrel touching at the end of the forend? It isn’t because the factory doesn’t know better, it’s because on factory production type rifles they will group better with a little upward pressure to dampen barrel vibrations. Yes, target rifles have the barrel floated so nothing touches the barrel from the receiver forward but these guns have a lot of extra work done to them to minimize vibrations before they are put in the stock. You should inform the customer that there is no guarantee that the rifle will shoot better after the barrel has been floated and the receiver bedded, in fact it might shoot even shoot a little worse! If the decision is made to float the barrel because the barrel is pushing against one side understand that this correction should be made by properly centering the receiver and not by cutting away at the barrel channel until the barrel stops touching. This will result in an uneven gap on each side of the barrel or a gap big enough to “chase a cat around” if you try to event up.

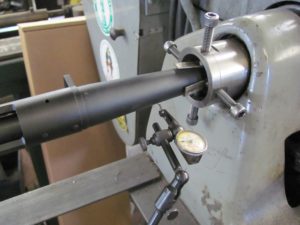
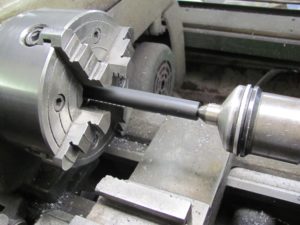
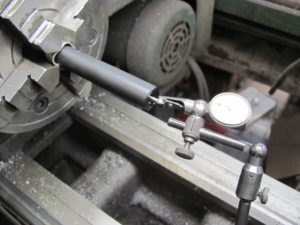
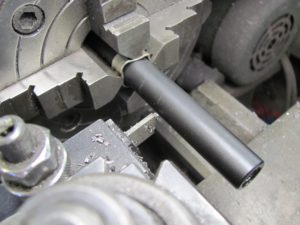
Next problem is what type of epoxy bedding compound? While there are many types of epoxy out there to try the best advice I can give is stick to using something either well known to give great results or at least something built specifically for bedding rifle and guaranteed. It is too much work to try and save 3 dollars by using a cheap substitute. Remember, the customer is paying for the material and won’t be happy when the gun shoots loose in epoxy that broke or never hardened properly. You will also do better work when you use products that are easy to use with a longer working time. You will need a lot more than 5 minutes to properly apply and center the action in the epoxy. Compounds designed for bedding will have a generous working time. In the past I used Bisonite and Marine Tex with good results but for the last several years Brownell’s Acra Gel and Steel Bed have become my favorites. Generally I prefer the Acra Gel for most bolt gun beddings and use the steel bed for applications that require the maximum in compression strength like M1As and Garands. The Acra Gel seems to have a quality that allows it to absorb vibration. The Garands and similar service rifles don’t have a huge recoil area and I like to have something really hard to stand a lot of pounding. That’s where the Steel Bed excels. Building these rifles for match shooting is a specialty that has almost disappeared since the AR15 have taken over the sport but the occasional job still shows up.

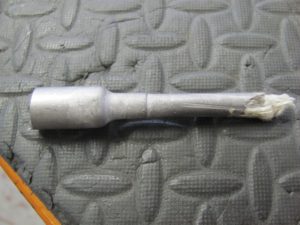
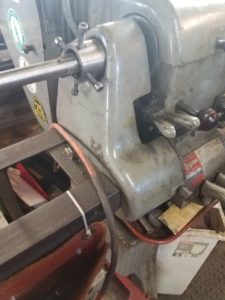
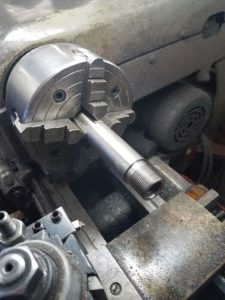
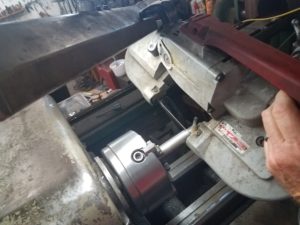
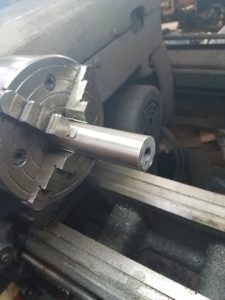
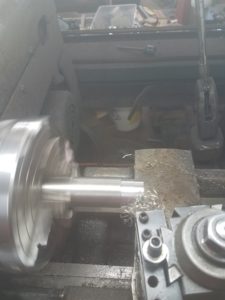
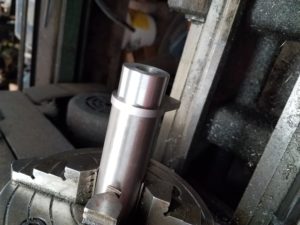
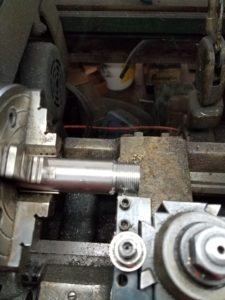
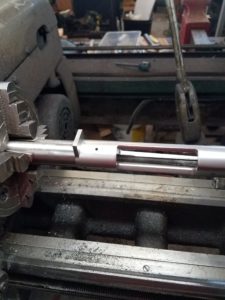
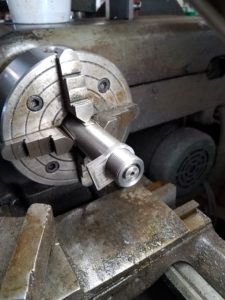
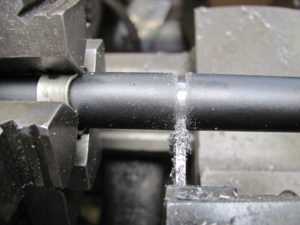
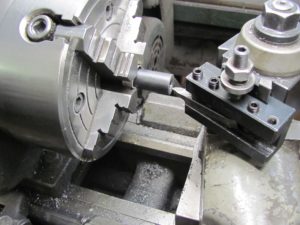
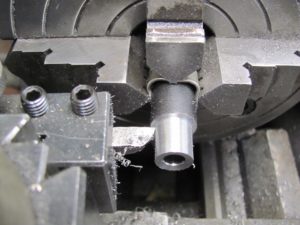
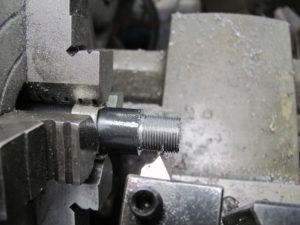
Next question is do I need to pillar bed. The bedding process came about to replace the wood around the receiver with a better material. Wood will swell when it comes in contact with moisture and shrink when it dries out. Even when a receiver was bedded there was a lot of wood left under the bedding between the receiver and trigger guard that could react with moisture and cause changes. Pillar bedding consist of replacing the wood between the bottom of the receiver and the trigger guard around the guard screw. After pillar bedding the pressure from the guard screw will not bear on any wood that could compress or change with the humidity. The pillars can be made of aluminum or steel or any stable material that has sufficient strength. You could make your own on the lathe or purchase from any gunsmith supply business. One often overlooked option is to drill out around the guard screws like you would in a normal pillar installation and then pour in solid glass pillars. You would want to do this with something with great compression strength like Steel Bed. Aluminum Bed or Titanium work great too and save weight if that is a concern.

Bottom line is it has to be bedded to shoot to its full potential. The actual process isn’t rocket science but it does require a good working knowledge about accuracy, which areas bear recoil, strength of materials and most of all a careful workman. Remember, only good work has any value!


freebore, throats and bullet jump


Freebore, Throats and Bullet Jump


Wow, you broke the bank and went all out to build that super gun and when you went to the range some old codger shot a smaller group than you with his lever gun! It happens all too often but why does one gun shoot better? It might be the first ¼ inch of the long trip to the target that’s the problem.

Even before shooting progressed to breech loading cartridge guns shooters had discovered how important it was to have the bullet enter the rifling straight. Early muzzle loading target rifles had false muzzles that attached to the barrel for loading. The false muzzle was bored and tapered to gently center the bullet and guide it into the rifling. Even after switching over to breech loaders most accuracy enthusiast would load the bullet from the muzzle and only have powder in the cartridge. Why did they go to so much trouble? Because it made a difference. The ones that didn’t load from the muzzle used special tools to seat the bullet in the rifling (called breech seaters) and then loaded the cartridge with powder and a paper card atop the powder to hold it in place.

After jacketed bullets became commonplace muzzle loading was no longer possible due to it being impossible to push the jacketed bullet down the barrel. Modern guns blow the bullet out of the case and it hits the rifling hopefully straight enough to enter and start spinning on center. If a bullet enters the rifling crooked it can’t straighten up. Since the average rifle bullet is spinning over 200,000 rpms you can imagine how much effect this has. The effect is more pronounced as the range increases.


So how do we get our bullets started straight? We reduce the tolerances as much as possible and make sure everything is straight. In benchrest rifles we make the neck portion of the chamber slightly undersize and turn our brass to just slide in with zero tolerance. This is good as long as experienced handloaders make the ammo. If such a gun has a standard round of ammo loaded in the chamber it acts like a clamp on the bullet and chamber pressure goes into the danger zone.

After doing the best we can with the neck we turn our attention to the throat. The throat is a short section of barrel at the end of the chamber where the rifling has been removed. The throat allows a bullet to be loaded into the bore. Without a throat the bullets would hit against the rifling and keep the round from going into the chamber. The throat doesn’t have to be the length of the entire bullet, only the length of the bearing section on the bullet that protrudes from the cartridge. In most rifles it is around ¼ of an inch. If the throat is longer the bullet will have more problems maintaining alignment coming from cartridge case to rifling. In most guns the bullet engages rifling before the base of the bearing section has exited the case. If the throat is not concentric and some rifling remains on one side the bullet will be pushed off center. This is a frequent problems and hard to detect unless you know how to look.

Figure 25The 155Palma bullet has a short bearing section. The throat can be shorter

My favorite way to check the throat is to make a casting of the throat with cerrosafe metal. It is a low temperature metal that looks like lead but melts at 180 degrees. I get mine at Brownells. Just plug the bore with a bit of paper towel in front of the throat and pour in a little metal through the breech. No need to fill the chamber. You are only interested in the throat. Tap it out from the muzzle and you have a faithful reproduction of the throat. You want to see that the rifling starts at the same distance from the chamber. This is also a good time to measure the neck diameter and bore diameter


Figure 26The throat is clearly visible on this Weatherby 7mm mag. This is what is called freebore.


If your throat looks uneven you might be able to cut the throat deeper and get it concentric. This is done with the throating reamer and can be done by hand however the best work will be placing the barrel in the lathe and using the tailstock to hold the reamer. Remember you are only cutting the rifling so it won’t take much effort to cut away too much. The cure for the deep throat is cutting off the chamber and setting the barrel back. A lot of work.

So what if you have a “deep throat” and just leave it. Depending on your objectives you might be happy with it. The famous Weatherby Magnums were designed with deep throats to get more velocity. It is called freebore. It works sort of like this: burning rate on powder goes up as pressure rises. When the pressure rises enough to push the bullet out of the case and into the rifling it has the same effect as making the case larger and this will drop the pressure. This allows rifles with deep throats to be loaded with more powder and achieve higher velocities. Accuracy is not enhanced but if you are shooting a deer you (or the deer) won’t know the difference. You can do this at any time with a throating reamer or the rifle will do it for you as you continue to shoot. A 243 Winchester will have the bullets fall out of the case before touching rifling around 2000 rounds. That’s a lot of deer to be skinned but only one moderate season for a highpower match shooter.

For the gunsmith you need to understand where the throat is, what effect it has on accuracy and velocity. How to repair or correct it. And how to explain it to your customer.


Barrel Setbacks

Barrel Setbacks

A lot of shooters may not be familiar with the term. I’m talking about removing a rifle barrel and cutting off the chamber and then cutting a new chamber and replacing. Sometimes it is done to correct headspace but usually as a way to give new life to a barrel that has fired enough rounds that accuracy has started to suffer. For the hunter it has little use. Most magnums will go over 1000 to 1500 rounds before groups start to open and normal calibers like the 308 might go 3000. That’s a lot of deer to skin. An active highpower competitor will shoot a match a month (200 rounds) and practice another 100. If the shooter can get another 3000 rounds it makes good sense to do a setback.
The portion of the barrel that wears out is the throat. The throat is a very short section of the barrel that has the rifling removed so the bullet can be loaded into the bore. In most rifles it is less than 3/8” long. When the cartridge is fired the burning and unburned powder erupt from the case like a hot sandblaster. This erodes the rifling and wears out the leading edge of the rifling. A casting made of the throat section or a careful inspection with a borescope will reveal the wear. When the bullet leaves the cartridge and jumps to the rifling it must contact all the lands at the same time or the bullet will enter the rifling crooked. If it enters crooked it stays crooked and exits spinning off center. When anything spinning 150,000 rpms is off center bad things happen!
Most target barrels are made with a large diameter so setting back will not be a problem. The amount to set back can be as short as one thread (.0625) to correct headspace or a couple inches. Normally I set back the length of the trunnion which will be around ¾ inch. That way I don’t have to worry with the existing threads and just cut new ones. ¾ inch will remove all the throat erosion and give a good job.
The pictures are from a job where I used a takeoff barrel from a tactical rifle and installed it on a Remington 700. The action was blueprinted and this called for rethreading .010 oversize so the threads on the barrel would be undersize. After cutting off the trunnion the barrel was centered in the 4 jaw chuck and the muzzle was centered on the cathead on the outside of the lathe.
Next the receiver was measured and recorded so I would know what size to make the trunnion (threaded portion). I measure twice to reduce errors!
From here on its just like installing a new barrel. Turn to size, thread, cut bolt recess, chamber, debur and reassemble.
If you are new to machine work practice threading till you can do it in your sleep. Use old barrels, cut off round stock and anything else. Take a course at the college and tell the teacher you just want to cut perfect threads. It will be time well spent.

Figure 1 centering in the cathead

Figure 2 centered in the 4 jaw

Figure 3 Cutting off the trunnion can be done with a cutoff tool but the saw is faster

Figure 4 Time to make a new trunnion


Figure 5Measure carefully

Figure 6record your measurements

Figure 7turning the trunnion to size

Figure 8finished and ready for threading

Figure 9Perfect threads!

Figure 10 The receiver is the go gauge for the threads

Figure 11 Chamber cut within .100 of final depth and go headspace gauge inserted

Figure 12 Action closed on go gauge and gap measured between barrel and receiver with feeler gauge. This tells you how much deeper to cut the chamber

Figure 13 With the tailstock ram locked the entire tailstock is pushed while watching the dial indicator and the final chamber depth can be cut within .001


Muzzle Brakes

Muzzle Brakes


These things seem to go in and out of style like sideburns. Maybe a magazine article or a picture in something popular starts it and for a while I put on brakes. Then after a year or two with the darn thing they want it removed and recrowned like it was never there. After a few years as a professional gunsmith I quit telling people what I thought was best and just did what they wanted. If they want to know what I think I tell them. but only if they ask for it. In keeping with that statement let’s talk about what types of brakes are available and how to do a perfect job installing.

First you have to know how the brake reduces recoil. Recoil comes from two sources. The first is the equal and opposite reaction of the small piece of copper and lead being propelled down range. This is actually not all that much. After all most bullets are fairly light in weight. The second source of recoil is the jet of gasses that exit with the bullets. Did you ever take off in a jet airplane? This phenomena is the main source of recoil and can be reduced with a well-designed brake. The job of the brake is to divert these gasses to the sides with little remaining to exit out the front with the bullet. If the gasses are diverted equally all the way around they cancel out any push on the barrel and the effect is zero.

Some brakes take this a step farther and direct the gasses to the rear at a slight angle. This actually results in the brake being pushed forward and countering recoil. Unlimited class pistol used in speed events are probably the best example of this. They divert so much gas up and back that some of the pistols actually have negative recoil. When the pistol fires it pulls forward and down! I have never seen a rifle brake achieve this but they are very effective at reducing recoil overall.

So what is the down side? There has to be one or every rifle would have a brake. The down side is noise, not just some but lots of noise. If you shoot a magnum rifle with a muzzle brake even one time without hearing protection you will be convinced you have permeant hearing loss. In our area deer hunters use box stands and sometimes don’t hold the muzzle out the shooting port or hold just barely out to not spook game. It is like having two boxers punch you in the ear at the same time. You can also get this same effect if you get out of your truck and shoot holding the muzzle over the bed of the truck. It works like the cheerleaders megaphone. If you read the ads many claim to have the “quiet brake” but I haven’t found one.

I have machined my own brakes but it just takes too much time. Order the one the customer wants but make sure it is larger in diameter than the barrel so you can turn it down to fit the contour. I like the Shrewd brakes from Brownells and try to keep a few in stock since they will work for several size bores. These come with an exit hole for 22 so don’t forget to open up this hole .020 larger than bullet diameter.

The machining of the barrel is very similar to the threading of the breech end into the receiver. These threads must be absolutely square with the bore so the muzzle is placed in the 4 jaw chuck and centered less than .001 thousandths. The other end must be centered inside the headstock or on the outboard end but some means. The threads must be beautiful little 60 degree angles and smooth to the touch. Take a lot of cleanup passes while you thread and understand that a cleanup pass removes metal too. The shoulder on the barrel must be absolutely square and maybe very very slightly undercut. This will make the seam disappear when the brake is tightened.

While the barrel is centered on each end and running true recut the crown as part of your job. It will only take a couple of minutes and you will probably help accuracy because what was there can’t be as good as your work. Use your favorite but make sure it is beautiful and free from burs. It might never be seen but so are the parts of the Rolex!

Figure 13The entire barrel has to be centered to make sure your work is in line with the bore. Here is the outboard end being centered. Note the soft copper shims to protect the barrel.

this is the outboard end and it must be on center. Adjust the 4 screws till it runs within .001


Figure 14 Holding the muzzle on the tailstock keeps it close to center while working on the outboard end.

Figure 15The barrel must be centered on the bore.

Figure 16Measure how much you want to remove (if any) and how long you want the threaded tenon to be

Figure 17 An electric bandsaw is faster but the cutoff tool works well if you are careful.

.
Figure 18 after cutting it is a simple operation to crown the barrel from the inside out. Note the compound set at 11 degrees.

Figure 19 next the tenon is cut to size.

Figure 20 Practice threading on scrap stock till you can make perfect threads before you try this on a good barrel!


Figure 21 Use the brake as your thread gauge.

Figure 22 Make sure the exit hole is correct size for the caliber. I make mine .020″ larger than the bullet.


Figure 23 With the compound set at 5 degrees I taper the brake down to barrel diameter.


Figure 24 After matching barrel finish and bluing it is ready for the customer. Might be a good time to straighten up the work bench too!
r


Some customer want the brake to be removable so they can shoot off the shooting bench without recoil and remove for hunting. If this is the case make a tool to fit the holes in the brake so they won’t deform the brake with a screwdriver trying to stick it in the holes. Remember if it looks ugly a year later and somebody ask who put it on the answer will be that gunsmith down the street without the explanation that it was damage by an ignorant attempt to remove or tighten. I also make a threaded knurled blank to screw on when the brake is removed to protect those beautiful threads. If the installation is permanent I use medium Loctite to secure.

With the brake tightened securely we can turn the outside to the same diameter as the barrel or taper slightly for a beautiful job. If the barrel is blue steel I caution the customer that the job may require bluing to achieve a good job. You can try but you can’t guarantee that you won’t leave marks on the bluing when you tighten the barrel in the lathe chuck. Use soft shims and be careful but if you scratch the barrel and you have to reblue for free you will basically lose money on the job unless you can do a satisfactory job with touch up. If the barrel is stainless make sure the brake is stainless and blend it all together with a nice wire wheel finish. It looks great.


Blueprinting

Blueprinting Rifle Actions


You might have heard the term and have some idea what the term means but don’t despair if you are in the dark. It isn’t any harder than woodpecker lips and maybe this will clear up some of the confusion.

Once you have that ultimate rifle barrel in hand that took 6 months longer than you thought for it to arrive you realize that a lot has to be done for it to shoot to its full potential. The machinist has struggled to make a rifled tube that is straight and consistent within .001 inch from end to end. Now it’s up to the gunsmith to do his part. This consist of cutting a chamber exactly in line with this bore and then making sure the action that will be behind this cartridge will be exactly in line with the bore and chamber. If anything is not either perpendicular or in line and parallel with the centerline established by the bore when the cartridge fires and pushes back against the bolt face forces will be transmitted angular to the center and result in pushing the barrel off center. This push will in the form of uneven barrel vibrations. Blueprinting an action is simply making every surface either in line or perpendicular (90 degrees) to the center line.

When we chambered our barrel we took great pains to center this barrel in the lathe. If possible we centered it on both ends within .0005 (1/2 thousandths). Then we cut the threads so we know whatever receiver we screw this barrel into that the chamber will be centered. So our first task is to find the center of the receiver. A few accessories come to our aid in this task. The first is an action mandrel. A mandrel is a device for holding work in a lathe. It has a long straight shaft that is turned to fit the center of the action where the bolt rides. It should fit within .001 and slide on without binding. Then it should have a threaded section that is threaded for a class A fit in the receiver threads. This mandrel will be turned outside the threaded section for maybe 2 inches and have center holes drilled in each end. This is important because if the mandrel can be screwed into the receiver with the short end but binds when you slide the long end into the receiver you know the receiver threads are the correct size but not centered in the receiver. This can be corrected by mounting the receiver in the lathe and threading on center. This is a very advanced operation and should only be attempted by an experienced operator. Another option is to use the action tap which looks like the mandrel but is really a tap with a long pilot that rides in the bolt track and cut threads square with the bolt. These taps come in standard and .010 oversize. If this tap is used the action will no longer accept a standard barrel so this is a big deciBlueprinting Rifle Actions


You might have heard the term and have some idea what the term means but don’t despair if you are in the dark. It isn’t any harder than woodpecker lips and maybe this will clear up some of the confusion.

Once you have that ultimate rifle barrel in hand that took 6 months longer than you thought for it to arrive you realize that a lot has to be done for it to shoot to its full potential. The machinist has struggled to make a rifled tube that is straight and consistent within .001 inch from end to end. Now it’s up to the gunsmith to do his part. This consist of cutting a chamber exactly in line with this bore and then making sure the action that will be behind this cartridge will be exactly in line with the bore and chamber. If anything is not either perpendicular or in line and parallel with the centerline established by the bore when the cartridge fires and pushes back against the bolt face forces will be transmitted angular to the center and result in pushing the barrel off center. This push will in the form of uneven barrel vibrations. Blueprinting an action is simply making every surface either in line or perpendicular (90 degrees) to the center line.

When we chambered our barrel we took great pains to center this barrel in the lathe. If possible we centered it on both ends within .0005 (1/2 thousandths). Then we cut the threads so we know whatever receiver we screw this barrel into that the chamber will be centered. So our first task is to find the center of the receiver. A few accessories come to our aid in this task. The first is an action mandrel. A mandrel is a device for holding work in a lathe. It has a long straight shaft that is turned to fit the center of the action where the bolt rides. It should fit within .001 and slide on without binding. Then it should have a threaded section that is threaded for a class A fit in the receiver threads. This mandrel will be turned outside the threaded section for maybe 2 inches and have center holes drilled in each end. This is important because if the mandrel can be screwed into the receiver with the short end but binds when you slide the long end into the receiver you know the receiver threads are the correct size but not centered in the receiver. This can be corrected by mounting the receiver in the lathe and threading on center. This is a very advanced operation and should only be attempted by an experienced operator. Another option is to use the action tap which looks like the mandrel but is really a tap with a long pilot that rides in the bolt track and cut threads square with the bolt. These taps come in standard and .010 oversize. If this tap is used the action will no longer accept a standard barrel so this is a big decision. The advantage is the threads will be concentric and not a little egg shaped from the tap only cutting out the tight spot.

Figure 10 Rethreaded and lug seats cut flat and square. Next step is to cut the action face square.

A Winchester 70 rethreaded and blueprinted

Figure 11 Using the tap for a mandrel and facing off the receiver mounted between centers in the lathe

Truing the action face between centers

Now our action has threads square with the center and we can proceed to cut the rest while the action is mounted on the mandrel and turned between centers. This is a quick operation and actually easier to cut than to check so I usually cut the front of the receiver with a facing tool only until it cleans up all the way around. If the bolt lug don’t show evidence of full contact with the seats in the receiver the bolt will be lapped in until machinist layout ink will be rubbed off both lugs when the bolt is worked in the action. If the lugs are too far out of contact (rare) the bolt can be mounted in the chuck and steady rest and the back of the lugs squared with a facing tool. Then they should be lapped and checked. The bolt lug seats in the receiver can also be squared in the lathe or with a lapping tool and lapping compound.

Now we have most of the receiver square and only have one more surface in the receiver to square. This is the bolt face. With the bolt closed and in firing position the bolt lapping tool can be screwed into the receiver and the bolt face lapped until it shows no sign of uneven contact. This tool can be made from an old cut off barrel bored out square with the threads for a 3/4 inch shaft mounted with a brass tip turned the diameter of the bolt face. All tolerances should be zero or close as possible. Of course you buy a tool from Brownells but that’s too easy.

Now the receiver face, bolt face, bolt lugs, bolt lug seats and threads are all square. But if you put it together without checking the recoil lug it might all be for nothing. If the lug is thicker on one side than the other it will push the barrel off center when it is tightened. The options are buying a replacement lug that is thicker and surface ground completely flat or grinding the lug you have on a surface grinder until flat. If the action was threaded with that oversize tap you will also have to open up the recoil lug so the barrel threads will go through without damage.

Now your action is ready to be fitted with that barrel. Obviously this work has to be finished before threading and chambering the barrel because most of these operations affect headspace. Cutting the receiver face and grinding the lug tighten headspace and squaring the bolt lugs, lug seats and bolt face will increase headspace. Of course the thread corrections have to be completed in the receiver first because the receiver is the “go” gauge for the barrel threads.

Work carefully and understand each operation and know your desired outcome. If there was ever a time to Do Good Work” this is it.


Final Fitting

FINAL FITTING


IT IS ALWAYS THE DEVIL IN THE DETAILS THAT GETS YOU. IT WILL BE A SMALL SENTENCE INCLUDED WITH THE PARTS YOU BOUGHT FOR THAT OLD GUN THAT SAYS “SOME FITTING REQUIRED” THAT RELEASES THE SELLER FROM ANY RESPONSIBILITY FOR HAVING THE PART THE CORRECT SIZE OR SHAPE. MAYBE THEY WILL USE THE PHRASE “TO BE INSTALLED BY A COMPETENT GUNSMITH” OR SOMETHING ELSE BUT IT COMES DOWN TO THE BOTTOM LINE IF YOU READ LONG ENOUGH, IT WILL BE THE WORK OF THE GUNSMITH THAT WILL EITHER MAKE THAT GUN WORK BETTER THAN NEW OR SOMETHING LESS. WHEN IT GETS DOWN TO THE LAST FEW THOUSANDTHS IT IS THE WORK OF THE OLD MASTER GUNSMITHS THAT WE WANT TO COPY. TO DO THIS WE NEED TO KNOW HOW THEY DID IT WAY BACK WHEN. EVEN THOUGH WE CAN APPRECIATE THE BEAUTY OF THEIR WORK THERE IS NO NEED TO ABANDON MODERN CONVENIENCE WHEN IT WILL PRODUCE A SAVINGS OR ENHANCE WORK. THOSE OLD GUYS WERE ALSO ALWAYS LOOKING FOR A BETTER, FASTER AND EASIER WAY BUT THEY WOULD NEVER USE ANY METHOD THAT RESULTED IN LOWER QUALITY WORK. THIS IS WHY WE MARVEL AT THEIR WORK.

THE HAND SCRAPER IS A MAGIC TOOL FOR FINAL FITTING. NOT MANY PEOPLE REALIZE HOW VERSATILE AND BENEFICIAL THIS TOOL CAN BE. THINK OF THE SCRAPER AS A ONE TOOTH FILE. IT CAN REMOVE THE FINEST SHAVING OF METAL AND CAN BE CUSTOM GROUND TO ANY SHAPE AND REGROUND AS MANY TIMES AS THE STEEL WILL ALLOW. STOCK MAKERS ARE ALL ABOUT SCRAPERS FOR REMOVING THAT FINAL BIT OF WOOD TO ACHIEVE THE PERFECT FIT BUT SCRAPERS ARE JUST AS VERSATILE WHEN IT COMES TO REMOVING METAL. AS LONG AS THE SCRAPER IS HARDER THAN THE METAL IT WILL REMOVE METAL. MY FAVORITE IS A THREE SIDED SCRAPER GROUND FROM AN OLD THREE SIDED FILE. I LIKE THE FLATS AROUND 1/4 INCH WIDE AND MINE TAPERS TO A POINT AFTER ABOUT 1 INCH. IT IS SET IN A SMOOTH HARDWOOD HANDLE. I HAVE SEVERAL OTHERS BUT THIS IS MY FAVORITE.

SMOKE IS THE MACHINIST INK OF OLD. A LIGHT COAT OF SOOT FROM A KEROSENE LAMP WILL MAKE A FLAT BLACK COATING THAT WILL BE DISTURBED BY THE LIGHTEST TOUCH. IN USE THE PART IS SMOKED AND THEN WORKED TO REVEAL WHERE THE HIGH SPOTS ARE LOCATED. THESE SPOTS ARE LIGHTLY SCRAPED OR POLISHED TO ACHIEVE A BETTER FIT. IT WON’T MAKE MOTHER HAPPY WHEN SHE SEES YOUR HANDS BUT IT HAS WORKED FOR CENTURIES. OF COURSE ANYTIME YOU WILL BE USING AN OPEN FLAME AT THE WORKBENCH OR EVEN INSIDE THE SHOP STOP AND REVIEW YOUR SAFETY.

ABRASIVE BLASTING WITH GLASS BEADS CAN BE OF USE LIKE THE SMOKE POT. WHEN THE PARTS ARE EVENLY FROSTED FROM THE BEAD BLASTER THEY CAN BE ASSEMBLED AND WORKED TO REVEAL HIGH SPOTS AND AREAS OF DRAG. THIS MIGHT BE EASIER THAN SMOKE IN SOME APPLICATIONS BUT BE CAREFUL WITH GETTING GLASS BEADS IN SENSITIVE AREAS.

LAPPING PLATES HAVE BEEN USED TO ACHIEVE PERFECTLY FLAT POLISHED SURFACES ON PARTS SINCE BEFORE JOHN BROWNING’S GRANDPA PICKED UP HIS FIRST FILE. LAPPING PLATES ARE PERFECTLY FLAT PLATES THAT ARE SCORED AT REGULAR INTERVALS FOR ABRASIVE COMPOUND. AS THE PART IS MOVED ACROSS THE SURFACE OF THE PLATE HIGH POINTS ARE GROUND DOWN UNTIL THE PART BECOMES PERFECTLY FLAT. IT IS LIKE A MANUALLY POWERED SURFACE GRINDER! PARTS LIKE THE SIDES OF HAMMERS AND TRIGGERS REALLY GET SLICK WHEN THE SIDES ARE POLISHED ON A LAPPING PLATE.

OTHER LAPS CAN BE FASHIONED INTO ANY REQUIRED SHAPE AND USED TO POLISH ALMOST ANYTHING. JUST LIKE BUFFING WHEELS THEY SHOULD ONLY BE USED WITH ONE SIZE ABRASIVE. LAPS CAN BE MADE OF LEAD, BRASS OR EVEN WOOD. IN USE THE ABRASIVE STICKS INTO THE SOFT SURFACE AND CUTS THE HARDER METAL. WHILE NOT EXACTLY LAPPING, A WOODEN STICK WITH BROWNELL’S 555 POLISH WILL TAKE STEEL TO AN OPTICAL FINISH AND PUT AN EDGE ON A KNIFE THAT IS SCARY SHARP.

POLISHING STICKS CAN BE MADE UP WITH FINE SANDPAPER FOR A FEW BUCKS THAT WILL DO AWESOME POLISHING. SIMPLY PUT THE PAPER ON A FLAT SURFACE AND SPRAY WITH ADHESIVE. THEN WRAP TIGHTLY ON THE STICK AND TRIM EXCESS WITH A RAZOR KNIFE. A POOR BOY’S VERSION OF A LAPPING PLATE CAN BE MADE BY USING THE FINE SANDPAPER GLUED TO A FLAT SURFACE. WOOD WILL WORK BUT SOMETIMES A TRIP TO THE LOCAL GLASS SHOP WILL RESULT IN A PIECE OF FLAT GLASS THAT WILL SERVE AS PERFECTLY FLAT BACKING JUST FOR THE PRICE OF ASKING!

ONE OF THE CLOSELY GUARDED SECRETS OF MASTER GUNSMITHS WAS TO MATCH WORKING PARTS AS TO HARDNESS. THIS REQUIRES A ROCKWELL TESTER BUT THE RESULTS WILL BE YOUR WORK HOLDING UP BETTER TO WEAR. IT ONLY MAKES SENSE THAT WHEN A HARD AND NOT SO HARD PART RUB TOGETHER FOR YEARS THAT THE SOFTER PART WILL WEAR OUT, HOWEVER IF BOTH PARTS ARE EQUALLY MATCHED THE WEAR LOAD WILL SHARED AND THE PARTS WILL GO THROUGH MANY MORE CYCLES BEFORE THEY NEED REFITTING. THE FAMOUS PISTOLSMITH JOHN VIDECKI WAS ENVIED FOR 1911 TRIGGER JOBS THAT SEEMED TO OUTLAST EVERYBODY ELSE’S WORK. HE TOLD ME HE SORTED AND MATCHED UP HAMMERS AND SEARS TO THE SAME ROCKWELL HARDNESS BEFORE HAND AND THAT MADE THE DIFFERENCE. HE ALSO MADE SURE OF CORRECT PART GEOMETRY. WE SHOT TOGETHER FOR MANY YEARS AND HAD A LOT OF GOOD TIMES.


TIMOTHY P. WHEALTON


Ackley Improved

Ackley Improved


Maybe you heard the term but are not exactly familiar with the Ackley conversion but it has been around over 50 years. A brain storm of the famous P.O. Ackley, it is a unique way to increase performance from many of our favorite calibers.

The Ackley Improved conversion is essentially an enlarged chamber that by clever design will still allow the parent cartridge to headspace and be held tight against the bolt face. Upon firing the brass will be blown out and forward to conforming the brass to the Ackley Improved dimensions.

The Ackley Improved case will have dimensions that are straighter in the body with less taper. This increases capacity which makes for more powder and increased velocity. The most notable feature of the improved case is an increase in the shoulder angle. Usually the new shoulder will be a 40 degree but not always. This sharper angle shoulder contributes to more consistent headspace and less case stretching. It also seems to improve barrel life by reducing throat erosion.

So if the new case is so much better then why aren’t they made this way to start with? Simple, you can’t form the sharp angles with the forming dies used to manufacture cases. The only way to form the brass is by fire forming. This means firing the rifle to make a piece of brass. It isn’t complicated, you just load a factory round and pull the trigger. It even shoots fairly well with the factory load! Matter of fact this is another of the really bonuses of the Ackley Improved. If you are out of ammo you can shoot the parent case. This can be a large thing if this is your favorite rifle and you are on the hunt of a lifetime but your ammo runs out or is lost. If you were using one of the other wildcat cartridges it would be all over but with the Ackley, no problem!

For most hunters and casual shooter this is nothing more than a minor inconvenience but if the shooter happens to be a competition shooter that uses a lot of brass it might be another story. Consider a Highpower Rifle competitor that need 300 pieces of brass. Now if this same shooter is using a 243 Winchester that has a barrel life of 1200 rounds that might mean giving up 1/4 of the barrel life to make brass. This isn’t to say that shooting the parent cartridge wouldn’t be accurate enough to shoot the 200 yard portion of the match but after these shooters drive 500 miles and pay entry fees to shoot they don’t want to have any variables like a case that doesn’t fit the chamber perfectly. Some are even hesitant to use new brass that hasn’t been fired in that particular chamber before!

It seems the most asked question about the Ackley conversion will be how does it group when fire forming. I have tested several through the years and most did better than expected. In the last few years I rechambered these in 3006, 7×57, 22-250 and 280. I don’t remember any shooting larger than 1 1/2 inch at 100 yards and the 22-250 grouped under an inch.

So after you answer all the customers questions and he reads some of those articles about Ackley Improved and how much better it shoots he decides to have you convert his favorite rifle. Now what do you need to know and what do you need to buy? The knowledge part is basic barrel fitting and headspace along with a good understanding about what happens to a cartridge when you pull the trigger. The buy part is easy, an Ackley Improved reamer and one headspace gauge. One headspace gauge? Yep, one gauge if you already have a standard set of go and no go gauges in the parent caliber size.

Here is what happens when a high power rifle cartridge fires in a chamber. First the firing pin is released by the sear and travels forward striking the primer. The case is pushed forward as far as the available headspace will permit. The primer crushes and the compound explodes sending flames through the flash hole and igniting the powder. Powder burns and pressure increases inside the case. The increase in pressure speeds up the rate of burn tremendously and the pressure skyrockets. The bullet moves out of the case and goes to the end of the throat. The thin case walls are held against the camber walls by what ever the working pressure of the load generates, maybe 60,000 pounds. When this pressure pushes back it stretches the case back toward the bolt face. With the thin walls held tightly against the chamber wall the thin brass just above the head of the case stretches until the head of the case rest on the bolt face. Hopefully everything is square and true and the bullet enters the rifling straight and exits the crown spinning true and on center.

To make sure this happens with an Ackley Improved we have to know how the parent case in going to headspace in new chamber. If you study the chamber drawings, reamer, parent case and fired case you will see the parent case only contacts the new chamber in a small circle at the base of the neck. With such a small area to headspace on the cartridge has to fit tight. For this reason an Ackley Improved should be set up with headspace less than a standard chamber. When converting to A I the go gauge should be used as a no go and a special gauge ordered or made that is .004″ short for a no go gauge.

This means rechambering to A I will not be as easy as sticking in the reamer for a couple turns but will require setting the barrel back at least one thread to get headspace too tight before you start to ream. If the barrel is a Remington or Winchester one turn will be .0625 inch so you will have plenty of room to work.

By the time you have removed the barrel, cut back the barrel shoulder the correct amount so the barrel will tighten up with the sights or lettering in the right place, cut back the face of the barrel so it won’t be hit by the bolt, recut the cone breech, deepen the extractor cut so it will work and reinstall the barrel in the receiver without leaving any marks on the barrel or receiver you will have earned your pay.

The Ackley conversion is not a small job and should not be attempted till you are competent in all phases of barrel fitting. Just remember “a happy customer will tell a friend but an unhappy customer will tell ten so do good work!


Timothy P. Whealton


Case Forensics


The Gunsmith Is On The Case!


Many times a Gunsmith will have to be smarter than Sherlock Holmes to find the cause of a malfunction. The ability to inspect a fired case and determine what happened when it fired or attempted to fire can be a great help in solving the mystery. Let’s look at how many clues the brass can give up to the savvy Gunsmith.

Reloading problems are always center stage when the customer says “It works fine with factory loads!” Start with getting as much info from the customer as possible. Ask the customer to describe the malfunction in detail. Was it a failure to load, feed, fire, extract or eject? Does it happen on the first, second or third round? Is it always, frequent or sometimes? Did it ever work or has this just started? Have any recent changes or repairs been made to the gun? Do you have any of the ammo you can leave for analysis and testing? Was this a load you found in a reloading manual or other reliable source? Have you reloaded ammunition before?

Look at the ammo for any abnormal signs like bulges, dents or primers that are not fully seated. If it looks normal measure case length and bullet diameter (It is hard to tell the difference between a 270 and a 7mm without a micrometer!). If you have a case micrometer measure the headspace of the ammo and compare with a go headspace gauge or factory ammo. While good ammo is very consistent it has a maximum and minimum size just like your chamber so remember the largest ammo should not be larger than the go gauge.

If the ammo looks correct you can try it in the gun for ease of chambering. Now I hope I don’t have to tell you about safety and loading firearms in the shop! Do this at the test range and use personal protection or remove the firing mechanism like taking the firing pin out of the bolt or just unscrewing the cocking piece on a bolt action. Actually with the firing pin and spring removed most bolt actions allow you to “feel” the action closing a lot better. For an even better feel you might want to also remove the ejector plunger if it has one like a Remington 700.

If you feel resistance when closing the bolt and the case dimensions measure good for headspace then look carefully at the bullet seating depth and make sure the throat is long enough to accommodate the bullet. Color the bullet with layout ink, magic marker or smoke and look for impressions left on the bullet from the rifling. The barrel might need throating if it was just rechambered or it might be solved by seating the bullet deeper or changing to a different style bullet.

If the loaded cartridge chambers without interference and the loading data looks correct then it is time to test fire. If there is any doubt as to the safety of the firearm or the ammunition then you must play it safe and fire the gun with a lanyard. An old tire makes a good rest if you place the butt of the stock on the inside edge and tie the forearm down with a piece of rope to the opposite side. This will secure the gun so it can’t flip off the tire but allows it to recoil against a surface that will give way enough to prevent damage. Placing the tire and gun on the other side of a berm or solid object and using a long cord will keep you safe.

After firing inspect the fired case for any abnormalities like splits, bulges or odd impressions on the case. At full chamber pressure the brass case will push brass into any old pits or tool marks and cause extraction problems. These might show up as a freckled surface on the fired case. It might also show up as damage to the rim of the case when the extractor has to pull harder than normal to free the case from the chamber.

Push a new bullet into the neck of the fired case and check for clearance. If the fired case mouth is tight on the bullet the case neck might be too tight. This might be from a tight neck chamber or brass that has flowed forward into the neck area and thickened the walls of the neck. This could result in pressure variations from shot to shot and even lead to pressures in the danger zone. Measure the diameter of neck on the loaded ammo and compare with fired cases and factory ammo if available. Many custom chambers will require case necks to be reduced in diameter to match chamber dimensions. Experienced benchrest competitors understand these loading techniques but the guy that just bought his rifle at the gun show might need some help!

Chamber pressure above normal limits will usually show on the fired case as well. This can be tricky and should never be used as a reliable indication of a normal load but the signs of high pressure should not be ignored. Primers that have “flattened” or lost their rounded edge, brass that has started to flow into extractor or ejector recesses or just sticky brass in a gun that extracts factory loaded ammo without problems can all indicate higher than normal pressure.

Even if the chamber pressure is within normal limits some guns can still have ammo problems. Probably the M1 Garand is the most famous for having problems with gas port pressure but it can affect other gas operated guns as well. These mechanisms are not powered by the pressure at the chamber by rather the pressure behind the bullet when it passes the gas port. This “port pressure” can be much higher with slower burning powders even when muzzle velocity is lower. This higher port pressure can slam the working parts to the rear damaging operating rod, bolt and even the receiver to the point of failure. Make sure the load is an accepted load for the type of firearm that will be firing the ammo.

Even where the ammo falls on the ground in relation to the gun can give information about the functioning. Brass ejected forward of the gun usually indicates a light load and brass ejected rearward can indicate the action operating with more force than necessary. Even brass ejected with no pattern can indicate something changing from shot to shot.

Whatever the cause of the problem the brass can many times give up some good clues and help you solve the riddle. Go slow, look at everything and above all, “Do Good Work”, it’s the only kind that matters!