Muzzle Brakes

Muzzle Brakes


These things seem to go in and out of style like sideburns. Maybe a magazine article or a picture in something popular starts it and for a while I put on brakes. Then after a year or two with the darn thing they want it removed and recrowned like it was never there. After a few years as a professional gunsmith I quit telling people what I thought was best and just did what they wanted. If they want to know what I think I tell them. but only if they ask for it. In keeping with that statement let’s talk about what types of brakes are available and how to do a perfect job installing.

First you have to know how the brake reduces recoil. Recoil comes from two sources. The first is the equal and opposite reaction of the small piece of copper and lead being propelled down range. This is actually not all that much. After all most bullets are fairly light in weight. The second source of recoil is the jet of gasses that exit with the bullets. Did you ever take off in a jet airplane? This phenomena is the main source of recoil and can be reduced with a well-designed brake. The job of the brake is to divert these gasses to the sides with little remaining to exit out the front with the bullet. If the gasses are diverted equally all the way around they cancel out any push on the barrel and the effect is zero.

Some brakes take this a step farther and direct the gasses to the rear at a slight angle. This actually results in the brake being pushed forward and countering recoil. Unlimited class pistol used in speed events are probably the best example of this. They divert so much gas up and back that some of the pistols actually have negative recoil. When the pistol fires it pulls forward and down! I have never seen a rifle brake achieve this but they are very effective at reducing recoil overall.

So what is the down side? There has to be one or every rifle would have a brake. The down side is noise, not just some but lots of noise. If you shoot a magnum rifle with a muzzle brake even one time without hearing protection you will be convinced you have permeant hearing loss. In our area deer hunters use box stands and sometimes don’t hold the muzzle out the shooting port or hold just barely out to not spook game. It is like having two boxers punch you in the ear at the same time. You can also get this same effect if you get out of your truck and shoot holding the muzzle over the bed of the truck. It works like the cheerleaders megaphone. If you read the ads many claim to have the “quiet brake” but I haven’t found one.

I have machined my own brakes but it just takes too much time. Order the one the customer wants but make sure it is larger in diameter than the barrel so you can turn it down to fit the contour. I like the Shrewd brakes from Brownells and try to keep a few in stock since they will work for several size bores. These come with an exit hole for 22 so don’t forget to open up this hole .020 larger than bullet diameter.

The machining of the barrel is very similar to the threading of the breech end into the receiver. These threads must be absolutely square with the bore so the muzzle is placed in the 4 jaw chuck and centered less than .001 thousandths. The other end must be centered inside the headstock or on the outboard end but some means. The threads must be beautiful little 60 degree angles and smooth to the touch. Take a lot of cleanup passes while you thread and understand that a cleanup pass removes metal too. The shoulder on the barrel must be absolutely square and maybe very very slightly undercut. This will make the seam disappear when the brake is tightened.

While the barrel is centered on each end and running true recut the crown as part of your job. It will only take a couple of minutes and you will probably help accuracy because what was there can’t be as good as your work. Use your favorite but make sure it is beautiful and free from burs. It might never be seen but so are the parts of the Rolex!

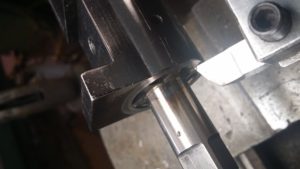
Figure 13The entire barrel has to be centered to make sure your work is in line with the bore. Here is the outboard end being centered. Note the soft copper shims to protect the barrel.
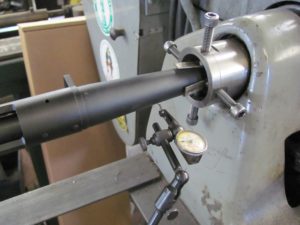
this is the outboard end and it must be on center. Adjust the 4 screws till it runs within .001


Figure 14 Holding the muzzle on the tailstock keeps it close to center while working on the outboard end.
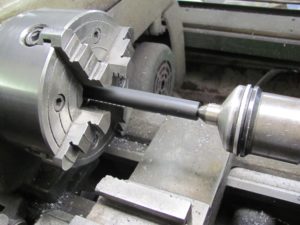
Figure 15The barrel must be centered on the bore.
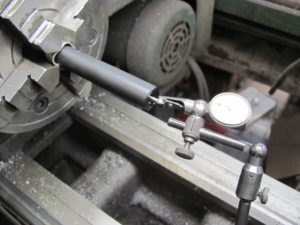
Figure 16Measure how much you want to remove (if any) and how long you want the threaded tenon to be
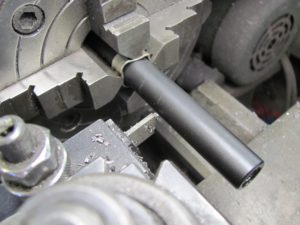
Figure 17 An electric bandsaw is faster but the cutoff tool works well if you are careful.
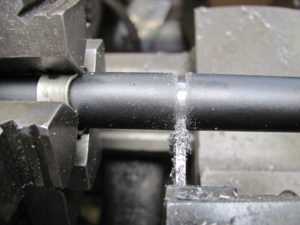
.
Figure 18 after cutting it is a simple operation to crown the barrel from the inside out. Note the compound set at 11 degrees.
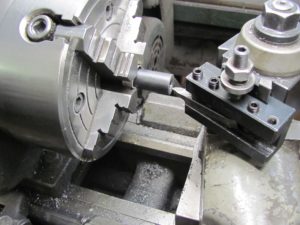
Figure 19 next the tenon is cut to size.
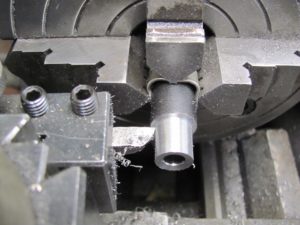
Figure 20 Practice threading on scrap stock till you can make perfect threads before you try this on a good barrel!
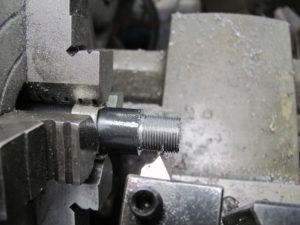
 

Figure 21 Use the brake as your thread gauge.
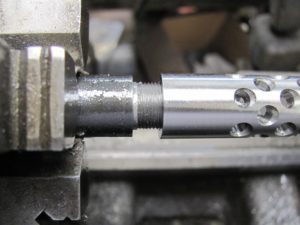
Figure 22 Make sure the exit hole is correct size for the caliber. I make mine .020″ larger than the bullet.
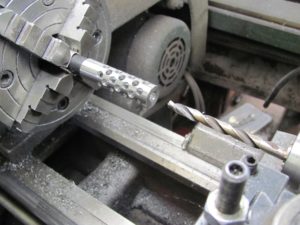
 

Figure 23 With the compound set at 5 degrees I taper the brake down to barrel diameter.
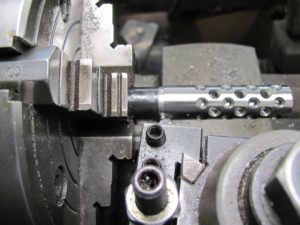
 

Figure 24 After matching barrel finish and bluing it is ready for the customer. Might be a good time to straighten up the work bench too!
r
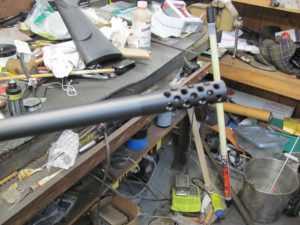
 

Some customer want the brake to be removable so they can shoot off the shooting bench without recoil and remove for hunting. If this is the case make a tool to fit the holes in the brake so they won’t deform the brake with a screwdriver trying to stick it in the holes. Remember if it looks ugly a year later and somebody ask who put it on the answer will be that gunsmith down the street without the explanation that it was damage by an ignorant attempt to remove or tighten. I also make a threaded knurled blank to screw on when the brake is removed to protect those beautiful threads. If the installation is permanent I use medium Loctite to secure.

With the brake tightened securely we can turn the outside to the same diameter as the barrel or taper slightly for a beautiful job. If the barrel is blue steel I caution the customer that the job may require bluing to achieve a good job. You can try but you can’t guarantee that you won’t leave marks on the bluing when you tighten the barrel in the lathe chuck. Use soft shims and be careful but if you scratch the barrel and you have to reblue for free you will basically lose money on the job unless you can do a satisfactory job with touch up. If the barrel is stainless make sure the brake is stainless and blend it all together with a nice wire wheel finish. It looks great.

 

Blueprinting

Blueprinting Rifle Actions


You might have heard the term and have some idea what the term means but don’t despair if you are in the dark. It isn’t any harder than woodpecker lips and maybe this will clear up some of the confusion.

Once you have that ultimate rifle barrel in hand that took 6 months longer than you thought for it to arrive you realize that a lot has to be done for it to shoot to its full potential. The machinist has struggled to make a rifled tube that is straight and consistent within .001 inch from end to end. Now it’s up to the gunsmith to do his part. This consist of cutting a chamber exactly in line with this bore and then making sure the action that will be behind this cartridge will be exactly in line with the bore and chamber. If anything is not either perpendicular or in line and parallel with the centerline established by the bore when the cartridge fires and pushes back against the bolt face forces will be transmitted angular to the center and result in pushing the barrel off center. This push will in the form of uneven barrel vibrations. Blueprinting an action is simply making every surface either in line or perpendicular (90 degrees) to the center line.

When we chambered our barrel we took great pains to center this barrel in the lathe. If possible we centered it on both ends within .0005 (1/2 thousandths). Then we cut the threads so we know whatever receiver we screw this barrel into that the chamber will be centered. So our first task is to find the center of the receiver. A few accessories come to our aid in this task. The first is an action mandrel. A mandrel is a device for holding work in a lathe. It has a long straight shaft that is turned to fit the center of the action where the bolt rides. It should fit within .001 and slide on without binding. Then it should have a threaded section that is threaded for a class A fit in the receiver threads. This mandrel will be turned outside the threaded section for maybe 2 inches and have center holes drilled in each end. This is important because if the mandrel can be screwed into the receiver with the short end but binds when you slide the long end into the receiver you know the receiver threads are the correct size but not centered in the receiver. This can be corrected by mounting the receiver in the lathe and threading on center. This is a very advanced operation and should only be attempted by an experienced operator. Another option is to use the action tap which looks like the mandrel but is really a tap with a long pilot that rides in the bolt track and cut threads square with the bolt. These taps come in standard and .010 oversize. If this tap is used the action will no longer accept a standard barrel so this is a big deciBlueprinting Rifle Actions


You might have heard the term and have some idea what the term means but don’t despair if you are in the dark. It isn’t any harder than woodpecker lips and maybe this will clear up some of the confusion.

Once you have that ultimate rifle barrel in hand that took 6 months longer than you thought for it to arrive you realize that a lot has to be done for it to shoot to its full potential. The machinist has struggled to make a rifled tube that is straight and consistent within .001 inch from end to end. Now it’s up to the gunsmith to do his part. This consist of cutting a chamber exactly in line with this bore and then making sure the action that will be behind this cartridge will be exactly in line with the bore and chamber. If anything is not either perpendicular or in line and parallel with the centerline established by the bore when the cartridge fires and pushes back against the bolt face forces will be transmitted angular to the center and result in pushing the barrel off center. This push will in the form of uneven barrel vibrations. Blueprinting an action is simply making every surface either in line or perpendicular (90 degrees) to the center line.

When we chambered our barrel we took great pains to center this barrel in the lathe. If possible we centered it on both ends within .0005 (1/2 thousandths). Then we cut the threads so we know whatever receiver we screw this barrel into that the chamber will be centered. So our first task is to find the center of the receiver. A few accessories come to our aid in this task. The first is an action mandrel. A mandrel is a device for holding work in a lathe. It has a long straight shaft that is turned to fit the center of the action where the bolt rides. It should fit within .001 and slide on without binding. Then it should have a threaded section that is threaded for a class A fit in the receiver threads. This mandrel will be turned outside the threaded section for maybe 2 inches and have center holes drilled in each end. This is important because if the mandrel can be screwed into the receiver with the short end but binds when you slide the long end into the receiver you know the receiver threads are the correct size but not centered in the receiver. This can be corrected by mounting the receiver in the lathe and threading on center. This is a very advanced operation and should only be attempted by an experienced operator. Another option is to use the action tap which looks like the mandrel but is really a tap with a long pilot that rides in the bolt track and cut threads square with the bolt. These taps come in standard and .010 oversize. If this tap is used the action will no longer accept a standard barrel so this is a big decision. The advantage is the threads will be concentric and not a little egg shaped from the tap only cutting out the tight spot.

Figure 10 Rethreaded and lug seats cut flat and square. Next step is to cut the action face square.

A Winchester 70 rethreaded and blueprinted

Figure 11 Using the tap for a mandrel and facing off the receiver mounted between centers in the lathe

Truing the action face between centers

Now our action has threads square with the center and we can proceed to cut the rest while the action is mounted on the mandrel and turned between centers. This is a quick operation and actually easier to cut than to check so I usually cut the front of the receiver with a facing tool only until it cleans up all the way around. If the bolt lug don’t show evidence of full contact with the seats in the receiver the bolt will be lapped in until machinist layout ink will be rubbed off both lugs when the bolt is worked in the action. If the lugs are too far out of contact (rare) the bolt can be mounted in the chuck and steady rest and the back of the lugs squared with a facing tool. Then they should be lapped and checked. The bolt lug seats in the receiver can also be squared in the lathe or with a lapping tool and lapping compound.

Now we have most of the receiver square and only have one more surface in the receiver to square. This is the bolt face. With the bolt closed and in firing position the bolt lapping tool can be screwed into the receiver and the bolt face lapped until it shows no sign of uneven contact. This tool can be made from an old cut off barrel bored out square with the threads for a 3/4 inch shaft mounted with a brass tip turned the diameter of the bolt face. All tolerances should be zero or close as possible. Of course you buy a tool from Brownells but that’s too easy.

Now the receiver face, bolt face, bolt lugs, bolt lug seats and threads are all square. But if you put it together without checking the recoil lug it might all be for nothing. If the lug is thicker on one side than the other it will push the barrel off center when it is tightened. The options are buying a replacement lug that is thicker and surface ground completely flat or grinding the lug you have on a surface grinder until flat. If the action was threaded with that oversize tap you will also have to open up the recoil lug so the barrel threads will go through without damage.

Now your action is ready to be fitted with that barrel. Obviously this work has to be finished before threading and chambering the barrel because most of these operations affect headspace. Cutting the receiver face and grinding the lug tighten headspace and squaring the bolt lugs, lug seats and bolt face will increase headspace. Of course the thread corrections have to be completed in the receiver first because the receiver is the “go” gauge for the barrel threads.

Work carefully and understand each operation and know your desired outcome. If there was ever a time to Do Good Work” this is it.


Headspace


What is Headspace and why is it important?

Headspace is the amount of space in the chamber from the face of the bolt when it is locked in firing position to whatever stops a cartridge when it is dropped into the chamber. Actually what concerns us the most is the amount of space that is left when a loaded round is in the chamber. In an ideal world the cartridge will completely fill the chamber with no space but have no interference. This is not an ideal world so we have to have room for variations in ammo and dirt and powder fouling. We do this by having a minimum (go) and a maximum (no go) usually this range is .004 inch. We want to have no more space than a human hair so this is a job to be done with care and knowledge.

So why is this so important? Consider what happens when the cartridge is fired. Once the bolt is closed the firing pin hit’s the primer with sufficient force to crush the metal cover and ignite the explosive charge of the primer. This also pushes the loaded cartridge as far forward in the chamber as it can go and increases the space between the bolt face and the base of the cartridge to the maximum. Next the flash comes through the flash hole and ignites the powder. Pressure quickly builds and the thin brass walls of the case seal off and prevent any gasses from flowing towards the bolt. As the pressure quickly climbs it forces the head of case rearward stretching the thin sides of the case until the case head rest against the bolt face. If the distance is excessive the case head will be blown off and the full pressure of the cartridge will be loosed into the action. Remember the shooters eye is only a few inches behind this area and his hands and arms are lying parallel to the action. We are talking 50,000 lbs. plus with normal rifle loads. SCUBA tanks and welding cylinder have less than 3,000 so you get the idea.
But what if it just stretches the case but not enough to rupture? This is bad too especially for the reloader. This case is stretched thin just above the case head. When the reloader resizes he will push the shoulder back and the case will chamber again but the brass is already thin in this area just above the case head and when fired again the process repeats but maybe this time the thin area ruptures. If not this time maybe the third or fourth or sometime down the line. Also pushing that shoulder back each time usually shows up as a longer case neck needing to be trimmed and deburred.

All this shifting of the cartridge during firing also results in poor ignition of the powder and inconsistent accuracy as the bullet has a hard time getting started into the rifling straight. Misfires often result from the cartridge being pushed away from the firing pin.

But what happens if there is not enough room? Most firearms have built in safety mechanisms to prevent the gun from firing if the bolt is not fully locked in firing position. This is the scenario that insufficient headspace presents. The bolt face touches the case head before closing completely and when the trigger is pulled the shooter hears a click but it doesn’t fire. Many times a gun brought in for a new firing pin or a good cleaning when the real problem will be insufficient headspace.

So how do you measure headspace? The space to be measured is enclosed and out of sight so normal methods won’t work. Headspace gauges to the rescue. These are precision ground gauges that fit the area between the bolt face and whatever the cartridge comes to rest against. Most common are the family of rimless bottleneck cartridges. These include the 223, 308 and 3006 family of cartridges. Many times headspace gauges will work for a whole family of cartridges. The 3006 gauges will work for 2506, 270 Winchester, 8mm06, 35 Whelen, and 400 Whelen. 308 gauges handle 243 Winchester, 260 Remington, 7mm/08 and 358 Winchester. These cartridges and many others do not have a rim that projects outward past the case wall and rest on the bottleneck shoulder. The next type is the belted magnum. This type has a belt on the outside of the case just above the groove cut for the rim. This type headspaces like the rimmed case. The gauge measures only the distance from bolt face to rim. These types include 7mm Remington Mag, 300 Winchester, etc.

Next are the rimmed cases like 30-30, 303 British and 45-70. This gauge only measures rim thickness because that is what these cartridges rest upon even though some are bottleneck design. Last is the straight wall rimless that headspaces on the case mouth like 30 carbine and 45 ACP. Whatever the case type the gauges are used in the same way. First the chamber is cleaned of dirt or metal chips and then the go gauge is inserted. If the bolt will close without resistance the chamber is deep enough. Never try to force the bolt closed on the gauge because it is hardened steel and can damage chamber or bolt. Next remove the go and insert the no go gauge. This time when you try to close you should not be to close the bolt all the way. If you can, then the chamber is too deep for best performance. Next remove the no go and insert the field gauge and try to close. This gauge is usually .004 larger than the no go and if the bolt will close the gun is unsafe and should not be fired.

How can headspace problems be corrected? Too little headspace is the best problem. Usually a reamer turned by hand will remove a couple of thousandths and get us where we need to be. If more than a small adjustment the barrel should be removed and set up in the lathe to keep the reamer on line with the bore. For excessive headspace the barrel must be removed and the barrel shoulder set back towards the muzzle to allow the chamber to move closer to the bolt face. On an average barrel with 16 threads to the inch one full turn will send the chamber .0625 inch towards the bolt. Of course the barrel will need to be machined back maintain clearance and not touch the bolt face.

But what if the chamber is correct and the ammo is too short or long? Very important to understand that excessive headspace or insufficient headspace is a relationship of chamber size and ammo size. The same problems of an oversize chamber will be present when we have undersize ammo. In the last year I have seen two nice 7mm Remington Magnum rifles badly damaged when they were loaded and fired with 270 Winchester ammo. When the case expanded to fit the chamber it required more stretch that the brass could survive and the case ruptured. This amount of pressure blew out the magazine boxes and broke the floor plates turning them into projectiles that injured one shooters leg.

Headspace is critical for safety, functioning and accuracy. Make sure you measure everything several times and understand what you are measuring. This is not a “poke and hope job”.


Remington 1100 and 11/87

Remington 1100 and 11-87


Every gunsmith needs to have a good understanding of these guns. For many years the Remington gas operated auto has been the gun of the masses and for good reason. Soft recoil, points well and reliable when properly maintained have been qualities that have endeared these guns to more than one generation. It didn’t hurt that the discount stores put them on sale at cost from time to time.
When it comes to repair this one is also a winner for the gunsmith. Available parts and easily disassembled make it a pleasure to service. Like most guns there are some areas that require close attention for best functioning. These are as follows.

Choke tubes– This applies to all shotguns with removable chokes. Remove, clean and apply a light coat of grease frequently. This is a very fine thread and at the first sign of rust the tube is permanent. Getting out stuck choke tubes is a real pain in the neck and you run the risk of ruining the barrel. You will find more information on this in the section on choke work.

Gas system– Gas piston seal and o ring should be clean and slide easily on the magazine tube. Many guns come in with these parts incorrectly installed by the owner after he cleaned it and reassembled incorrectly. Check the o-ring for nicks or cuts and replace if necessary. Leave this area clean and dry or use an oil that will not burn and turn to gum. I like mobile one synthetic oil ( like for the car!). It will turn black but stay slick and doesn’t dry or gum up. The 11-87 has the relief ports and spring that must be in place. Make sure the retainer is still in the forearm that sit atop the relief port spring.

Feed latch and interrupter– Looking in from the bottom with the barrel up the feed latch is on the left and the interrupter is on the right. The feed latch is operated by a bevel cut on the action bar and the interrupter by the disconnector on the trigger group. These parts must be in proper adjustment for the gun to feed shells from the magazine. Replace if worn or broken. The interrupter mounting stud can wear and the interrupter will have too much play. The retainer can be replaced with a thicker one from Brownells and remove this play. A lot easier and cheaper than sending back to the factory for a new interrupter stud to be installed.

Carrier and carrier latch– Sometimes bent by someone prying out a shell, if that is the case replace with a new one. If it is protruding below the action when viewed from the side expect this. It probably won’t lift the loaded round high enough to feed into the chamber. The carrier latch is located at the back of the carrier and is operated by a shell being released by the feed latch and striking the carrier latch. If it doesn’t hit hard enough the latch will not operate and the bolt will remain open. Problems in the magazine tube might show up here as a malfunction of the carrier latch. A weak, broken or jammed magazine spring will cause this. I see a lot of damaged magazine spring for hunters making a plug from a green stick in the field last year and the moisture from the stick caused the spring to rust. Another problem are the plastic followers. Dirt will embed into the sides making it hard for the follower to slide inside the magazine. Replacements are available made of stainless or aluminum and are a much better choice.

Bolt– Extractors break and can be replaced without disassembly. The firing pins break rarely but it does happen. More frequently the plastic buffer around the pins breaks and jams the pin or action. As always when you have a bolt in your hand inspect for cracks or unusual wear.

Mainspring– A problem area especially for the waterfowl hunters. Hunting in rain and salt water allows water to drain into the action spring tube and the spring will rust. Dirt and other debris along with oil also accumulates and the action of the bolt becomes sluggish. The mainspring tube nut will also become rusted in place and require an impact wrench and penetrating oil to break free. Coat the threads with grease anytime you have one of these disassembled for cleaning or repair.

Of course there are not any parts the customer can’t break, bend or lose. After you have repaired and cleaned several you will develop a feel for these guns by cycling the action and will know what needs to be done. Most of the time these guns can be repaired, cleaned or both in 30-45 minutes for an experienced gunsmith.

Browning A5


Browning A5 and copies


While most gun designs and cartridges are the subject of great debate there is one thing that isn’t. Who was the greatest gun designer of all time? John Browning of course. Our best loved and most successful designs are a powerful testimony to his genius. 1894 Winchester, 1911 Colt, BAR, M2 50 cal. ( Still in production), A5, Remington 11, Savage autoloader, Remington 8 and 81, Browning Highpower, Superposed and a lot more.

Love it or not, The A5 is a fantastic shotgun. For many decades of the 1900s there was no doubt that it was king. This was earned by reliability. A lot of people that used other guns wished they had an A5 but had to settle for something less expensive. Only during the latter part of the last century when hunters began a love affair with magnum loads did the A5 lose out to competitors. The recoil operated mechanism is not well suited for different power levels. Add that to the high cost of machining steel parts and it is time for a new design. Manufacturers are kind of funny, they don’t like to lose money.

The recoil mechanism requires a careful balance for best operation. This is located on the magazine tube and you need to completely understand how it functions before moving on to the rest of the gun. The ring attached to the barrel has a bevel cut on the side that bears on the bronze friction piece. This bevel causes the friction piece to squeeze the magazine tube when the barrel is pushed back during recoil and distribute the recoil during the cycle of operation. The goal is to have enough friction to completely absorb the energy by the time that the barrel has moved completely to the rear. Too soon and it won’t cycle the action, too late and the barrel/bolt combination slams into the rest of the gun and the action (along with the shooter!) is battered.

A combination of several factors determine how much friction is present between the friction piece and magazine tube. The quality of the surface on the tube, the type of oil on the tube, strength of recoil spring and placement of the friction ring all play a role.

Inspect the tube carefully. It should be smooth and shiny. Any scratches, dent or pitting will affect friction. If the gun was recently refinished and the tube is blue this will increase friction.

The type of oil can be a real troublemaker. The design of this gun was from 1900 before we had the super friction reducing lubricants of today. It needs a very light coat of oil for corrosion protection but none of the Teflon, moly, PTFE oils. These oils will defeat the recoil absorbing mechanism and the gun will literally beat itself to pieces. Broken stocks, split forends and even cracked receivers can result from just using the wrong lube. Many years ago I lubed my friend’s magnum with Breakfree when it first came out. He damaged a nerve in his shoulder and missed several good hunts. I think he would like to see me trip and fall to this day.

Of course the friction piece needs to hug the tub snugly. It has a steel spring around it that facilitates this. It should require a little effort to move it on the tube by hand. If it drops on, replace it. The steel spring that clamps around the friction piece should also be a very snug fit.

The friction ring is a small ring with a bevel cut that rides between the bronze friction piece and recoil spring. Its job is to cause the bottom of the bronze friction piece to squeeze the tube like the bevel of the barrel ring. This increases the grab of the friction piece for shooting heavy loads. Hold the friction piece against the barrel ring and push with the friction ring on the bottom while these parts are out of the gun and you will get a good visual of how it works. The friction ring can be placed below the recoil spring next to the receiver for safe keeping when shooting light loads.


With experience you will know by feel when this mechanism is properly tuned. Placing the unloaded gun on the floor butt down and pushing the barrel back into the receiver will be all you need to do. It should push back with smooth heavy pressure. If it is galling, gummy or sliding free it will need attention.

Now that you have a good idea how the recoil mechanism should work lets look at the cycle of operation and what problems can be expected.
Loading~ Older models require that the release button be pressed to allow the carrier to rise as you push a shell in the magazine. The latter models have a two piece carrier that allows shells to be pushed into the magazine without doing anything extra. This is a nice feature and older models can be retrofitted without any problems. If the magazine spring is rusted or broken it will jam the magazine follower. You should not hear any scraping or squeaking when you push on the follower. I like to do this with a small wooden dowel rod so I can move the follower several inches while listening and feeling for problems. The feed latch and shell stop should not interfere with the loading process. The cartridge stop is located on the bottom of the bolt and the shell to be fed will rest against it. If it is worn or otherwise defective then the shell can ride over this and get between the carrier and bolt. A real pain in the neck to push it back into the magazine and sometimes you have to dismantle the gun to clear the jam. You might need to grind the face square to prevent this.

Amazing how many people have never had anything but an A5 and don’t have any idea how it feeds. When the gun is fired the bolt and barrel are locked together and ride back into the receiver compressing the recoil spring and the action spring that powers the bolt. The shell to be fed into the action is pushing against the cartridge stop on the bolt and rides back with it until the shell stop that is located in the side of the receiver comes inward and catches the loaded shell and stops it from moving. This part operates on a cut on the barrel and is critical for functioning. It only protrudes about a 1/16th of an inch so it has to have a well-defined edge that will hold the shell. If this shell slips over the shell will continue and feed into the ejection port before the fired case can be ejected. The jam will be a failure to eject but the problem will be feeding too early. The fired case will be half out of the port and after you pull it free it will load the shell. If it does its job correctly then the shell will be delayed until the barrel bolt combination has reached the end of its range of motion. Understand that the bolt has not opened yet. Now the bolt overrides the carrier dog and is held to the rear. The powerful recoil spring now powers the barrel forward. The bolt locked to the rear holds the fired shell by the rim with the extractor and the barrel is pulled off of the fired shell. When the barrel is all the way forward the ejector mounted on the barrel strikes the shell rim opposite the extractor and the fired case is pivoted around the extractor. About the same time that the ejector strikes the shell stop folds back into the side of the receiver and the shell that was resting on it is released. The carrier that is connected to the bolt via the carrier dog is prevented from moving upward by the feed latch. The released shell now pushing rearward forces the feed latch to release the carrier and now the bolt can ride forward and the carrier rises lifting the new shell as the bolt pushes it into the chamber and the bolt lock rises and locks the bolt ready for the next firing. Whew! No wonder nobody knew how it worked. And we haven’t even got to firing
.
Firing~ the trigger of the A5 really shows off the talent of Mr. Browning. When the trigger is pulled the hammer that is held by the trigger releases and flies forward powered by the hammer spring. The hammer strikes the firing pin and it leaps forward striking the primer and you have another duck to pick. Sounds simple enough, what could go wrong? Let’s go back to the start. Before you pulled the trigger you pushed the safety to the fire position and heard a click. If the safety doesn’t click or stay in place the trigger spring is broken. This spring is under the hammer spring and has three fingers. The outside two prongs power the trigger return and the middle prong presses a detent ball that rides on the safety. That hammer spring also can be loose and won’t have enough power to fire. This is usually from someone trying to take down for cleaning and loosening the wrong screw. Notice the hammer hooks on front and back. The hammers will break but it is rare. Inspect for cracks, especially on the hammer that have been lightened by a series of holes being drilled through the side. Look at the safety sear which keeps the trigger from being pulled unless the bolt is closed and locked. This part rides inside the bolt link and is operated by rear of the slot in the link when the bolt goes all the way forward. The hammer also goes through the link to strike the firing pin. Firing pins break and many times keep working. If both parts are retained in the bolt it works like a two piece firing pin but might misfire now and then.

Extraction~ is fairly simple compared to feeding and firing. Remember the fired case is held to the motionless bolt as the barrel flies forward. Brownings have two extractors but the clones like the Remington 11 have only the right. You can inspect and see any problems. Notice that the left extractor is not a sharp hook but rather a smooth bump. Its job is to hold the shell against the bolt face and cause it to be released with a snap. Of course the problem can also be a pitted chamber or dirt and carbon. Caution the owner to lightly oil and keep the chamber clean. This will save a lot of extractors.

If extraction went well then ejection will probably be a snap. Ejectors do break loose and disappear or worse go into the action. You should have spotted this on the initial inspection. Sharp and square ejectors give best results.

If you understand these cycles and inspect carefully you should spot the problem. Browning A5s usually break parts instead of bending or deforming and this makes them easier to diagnose the problem.

Parts to keep on hand are friction rings, trigger springs, extractors and magazine springs. The other parts are so infrequently used it will usually be more economical to order as needed.

A5 3” Magnum

Not an entirely different gun but it has enough problems of its own to make it into a separate discussion. The main difference is a longer stiffer recoil spring that is designed to take up that shoulder bruising recoil of the magnum, and I mean the old lead shot 1 7/8 oz load. After steel shot became the norm for waterfowl it became apparent that steel didn’t recoil as much as lead (you knew that!) and adjustments were necessary.

The first look at the friction rings on the magnum A5 might cause a double take but if you understand how they work it becomes simple. Two bronze friction rings and three bevel cut friction rings allow the owner to make more mistakes than a blind man with a rubix cube. Remember one bevel is built in the barrel ring and for max friction you want bevels on each side of the bronze friction pieces. Now it sounds easier doesn’t it. Of course the same information about lubrication applies with the magnum but maybe even more so. With close to double the load and fierce recoil more is at stake.

This model came with a recoil pad as standard equipment and it should probably be upgraded to one of the new softer pads.
If the gun is used with steel shot and has a full choke barrel now is a good time to educate the customer about better patterns with steel if he has the choke opened up a little.

If the customer wants a more versatile gun capable of firing light loads as well you can make a kit consisting of a standard recoil spring and friction piece and make a spacer with the lathe out of aluminum to make up the difference in length between the springs and it will function with light loads. Just make certain he understands he will wreck the gun shooting magnums with the light spring.

The A5 family of shotguns have proven record of reliability in field conditions. The secret to a long trouble free life with an A5 is stay with a good load and tune the gun for it. For most of the years this gun was manufactured this was not a problem because there were only two choices, light field load or heavy (high brass). Remember this and educate your customer (sometimes harder than stacking BBs) and this gun will still give years of trouble free shooting.


Final Fitting

FINAL FITTING


IT IS ALWAYS THE DEVIL IN THE DETAILS THAT GETS YOU. IT WILL BE A SMALL SENTENCE INCLUDED WITH THE PARTS YOU BOUGHT FOR THAT OLD GUN THAT SAYS “SOME FITTING REQUIRED” THAT RELEASES THE SELLER FROM ANY RESPONSIBILITY FOR HAVING THE PART THE CORRECT SIZE OR SHAPE. MAYBE THEY WILL USE THE PHRASE “TO BE INSTALLED BY A COMPETENT GUNSMITH” OR SOMETHING ELSE BUT IT COMES DOWN TO THE BOTTOM LINE IF YOU READ LONG ENOUGH, IT WILL BE THE WORK OF THE GUNSMITH THAT WILL EITHER MAKE THAT GUN WORK BETTER THAN NEW OR SOMETHING LESS. WHEN IT GETS DOWN TO THE LAST FEW THOUSANDTHS IT IS THE WORK OF THE OLD MASTER GUNSMITHS THAT WE WANT TO COPY. TO DO THIS WE NEED TO KNOW HOW THEY DID IT WAY BACK WHEN. EVEN THOUGH WE CAN APPRECIATE THE BEAUTY OF THEIR WORK THERE IS NO NEED TO ABANDON MODERN CONVENIENCE WHEN IT WILL PRODUCE A SAVINGS OR ENHANCE WORK. THOSE OLD GUYS WERE ALSO ALWAYS LOOKING FOR A BETTER, FASTER AND EASIER WAY BUT THEY WOULD NEVER USE ANY METHOD THAT RESULTED IN LOWER QUALITY WORK. THIS IS WHY WE MARVEL AT THEIR WORK.

THE HAND SCRAPER IS A MAGIC TOOL FOR FINAL FITTING. NOT MANY PEOPLE REALIZE HOW VERSATILE AND BENEFICIAL THIS TOOL CAN BE. THINK OF THE SCRAPER AS A ONE TOOTH FILE. IT CAN REMOVE THE FINEST SHAVING OF METAL AND CAN BE CUSTOM GROUND TO ANY SHAPE AND REGROUND AS MANY TIMES AS THE STEEL WILL ALLOW. STOCK MAKERS ARE ALL ABOUT SCRAPERS FOR REMOVING THAT FINAL BIT OF WOOD TO ACHIEVE THE PERFECT FIT BUT SCRAPERS ARE JUST AS VERSATILE WHEN IT COMES TO REMOVING METAL. AS LONG AS THE SCRAPER IS HARDER THAN THE METAL IT WILL REMOVE METAL. MY FAVORITE IS A THREE SIDED SCRAPER GROUND FROM AN OLD THREE SIDED FILE. I LIKE THE FLATS AROUND 1/4 INCH WIDE AND MINE TAPERS TO A POINT AFTER ABOUT 1 INCH. IT IS SET IN A SMOOTH HARDWOOD HANDLE. I HAVE SEVERAL OTHERS BUT THIS IS MY FAVORITE.

SMOKE IS THE MACHINIST INK OF OLD. A LIGHT COAT OF SOOT FROM A KEROSENE LAMP WILL MAKE A FLAT BLACK COATING THAT WILL BE DISTURBED BY THE LIGHTEST TOUCH. IN USE THE PART IS SMOKED AND THEN WORKED TO REVEAL WHERE THE HIGH SPOTS ARE LOCATED. THESE SPOTS ARE LIGHTLY SCRAPED OR POLISHED TO ACHIEVE A BETTER FIT. IT WON’T MAKE MOTHER HAPPY WHEN SHE SEES YOUR HANDS BUT IT HAS WORKED FOR CENTURIES. OF COURSE ANYTIME YOU WILL BE USING AN OPEN FLAME AT THE WORKBENCH OR EVEN INSIDE THE SHOP STOP AND REVIEW YOUR SAFETY.

ABRASIVE BLASTING WITH GLASS BEADS CAN BE OF USE LIKE THE SMOKE POT. WHEN THE PARTS ARE EVENLY FROSTED FROM THE BEAD BLASTER THEY CAN BE ASSEMBLED AND WORKED TO REVEAL HIGH SPOTS AND AREAS OF DRAG. THIS MIGHT BE EASIER THAN SMOKE IN SOME APPLICATIONS BUT BE CAREFUL WITH GETTING GLASS BEADS IN SENSITIVE AREAS.

LAPPING PLATES HAVE BEEN USED TO ACHIEVE PERFECTLY FLAT POLISHED SURFACES ON PARTS SINCE BEFORE JOHN BROWNING’S GRANDPA PICKED UP HIS FIRST FILE. LAPPING PLATES ARE PERFECTLY FLAT PLATES THAT ARE SCORED AT REGULAR INTERVALS FOR ABRASIVE COMPOUND. AS THE PART IS MOVED ACROSS THE SURFACE OF THE PLATE HIGH POINTS ARE GROUND DOWN UNTIL THE PART BECOMES PERFECTLY FLAT. IT IS LIKE A MANUALLY POWERED SURFACE GRINDER! PARTS LIKE THE SIDES OF HAMMERS AND TRIGGERS REALLY GET SLICK WHEN THE SIDES ARE POLISHED ON A LAPPING PLATE.

OTHER LAPS CAN BE FASHIONED INTO ANY REQUIRED SHAPE AND USED TO POLISH ALMOST ANYTHING. JUST LIKE BUFFING WHEELS THEY SHOULD ONLY BE USED WITH ONE SIZE ABRASIVE. LAPS CAN BE MADE OF LEAD, BRASS OR EVEN WOOD. IN USE THE ABRASIVE STICKS INTO THE SOFT SURFACE AND CUTS THE HARDER METAL. WHILE NOT EXACTLY LAPPING, A WOODEN STICK WITH BROWNELL’S 555 POLISH WILL TAKE STEEL TO AN OPTICAL FINISH AND PUT AN EDGE ON A KNIFE THAT IS SCARY SHARP.

POLISHING STICKS CAN BE MADE UP WITH FINE SANDPAPER FOR A FEW BUCKS THAT WILL DO AWESOME POLISHING. SIMPLY PUT THE PAPER ON A FLAT SURFACE AND SPRAY WITH ADHESIVE. THEN WRAP TIGHTLY ON THE STICK AND TRIM EXCESS WITH A RAZOR KNIFE. A POOR BOY’S VERSION OF A LAPPING PLATE CAN BE MADE BY USING THE FINE SANDPAPER GLUED TO A FLAT SURFACE. WOOD WILL WORK BUT SOMETIMES A TRIP TO THE LOCAL GLASS SHOP WILL RESULT IN A PIECE OF FLAT GLASS THAT WILL SERVE AS PERFECTLY FLAT BACKING JUST FOR THE PRICE OF ASKING!

ONE OF THE CLOSELY GUARDED SECRETS OF MASTER GUNSMITHS WAS TO MATCH WORKING PARTS AS TO HARDNESS. THIS REQUIRES A ROCKWELL TESTER BUT THE RESULTS WILL BE YOUR WORK HOLDING UP BETTER TO WEAR. IT ONLY MAKES SENSE THAT WHEN A HARD AND NOT SO HARD PART RUB TOGETHER FOR YEARS THAT THE SOFTER PART WILL WEAR OUT, HOWEVER IF BOTH PARTS ARE EQUALLY MATCHED THE WEAR LOAD WILL SHARED AND THE PARTS WILL GO THROUGH MANY MORE CYCLES BEFORE THEY NEED REFITTING. THE FAMOUS PISTOLSMITH JOHN VIDECKI WAS ENVIED FOR 1911 TRIGGER JOBS THAT SEEMED TO OUTLAST EVERYBODY ELSE’S WORK. HE TOLD ME HE SORTED AND MATCHED UP HAMMERS AND SEARS TO THE SAME ROCKWELL HARDNESS BEFORE HAND AND THAT MADE THE DIFFERENCE. HE ALSO MADE SURE OF CORRECT PART GEOMETRY. WE SHOT TOGETHER FOR MANY YEARS AND HAD A LOT OF GOOD TIMES.


TIMOTHY P. WHEALTON


Hope

HOPE

I wrote this after reading 1st Peter. It’s a letter he wrote late in life to Christians living in a bad time. How did he have so much hope? Christians were being tortured in horrible ways for having faith in Jesus.
Hope gets a bad rap sometimes in our modern language. Let’s say I need to borrow $500 this month. You don’t really have it to spare but I convince you that I will absolutely pay you back before next month so you can pay your bills on time. You ask me after the 7th if I am going to pay and I say “absolutely”. You ask me on the 18th and I say “absolutely”. You ask me on the 28th and I say “I hope so”! You know you made a mistake. Seems hope has a double meaning. Be careful where your hope resides!

It’s not without reason that our God is referred to as the God of Hope throughout the bible. It is hope that is intertwined who we are as Christians. It sustains us, makes us joyful in good times and is our life preserver when times are bad. But what is it?

Hope is the confident expectation that things will be better. For Christians our hope centers on a future with God. Not just being there where God is but connected with God and able to share without holding anything back. That hope is in the future but tremendous rewards are given in the present for those with hope.

Everybody wants hope. Millions are spent each year as major corporations search for ways to give their employees hope. They call it “optimism”. You can call it faith, hope or optimism but it is still the same. It has been proven over and over that optimistic people work harder, are happier, and are healthier, more generous and smarter. You know this is true. Whenever you compare someone who can’t but thinks he can to someone that can but thinks he can’t, hopeful people win every time. Seems like hope is a gas gauge for the soul. People with plenty of hope are anxious to take on new task, work harder and want to things completed so they can tackle something new. People with hope have a peace that passes all understanding. Hope is the fire we have to keep burning in our lives.

No reason for a Christian to not be overflowing with hope. So what keeps us from bubbling over? It’s an enemy as old as time itself. He fell from Heaven like lightning before time began. He was there in the garden. He is still here and full of lies. He is Satan. He is always at your elbow. He can be well dressed and charming. He looks good in heels or blue jeans when it fits his purpose. If you are not working for God you will be working for Satan. His retirement plan stinks!

While our God is all about the future Satan is all about your past. God says I have cleaned you and made you new. Satan says you have done bad things and don’t deserve a good future. We know all too well the mistakes of our past. They haunt us without any help but Satan has plenty of help.

Who would help Satan? Sad answer is most of your friends and you and me. It might not be recognized at first glance but it’s there. You will see it as soon as a person starts to excel. We don’t like to be outdone so we help the Devil by pulling up someone’s past. No matter what they do we won’t let them escape their mistakes. Maybe we do it to make our mistakes look smaller but we do it. Peter tells us to be a student, not a critic. Students learn

So how do we get hope. If you are a Christian you have hope. But we want more. We want our hope tanks full and running over. Number 1 best way I found is to study the 4 stories of Jesus life. It’s the first 4 books of the New Testament. Matthew, Mark, Luke and John. Not just a glance but a study. The jewels are so numerous you will find new ones every time you look. Small details that bring understanding. Never stop learning. Without knowledge you can never have hope. With knowledge of God you can’t help but have hope!

The next way is to put God’s plan into action. God says just test me and you will know I am real and you will be filled with hope. Hope is faith and our Bible says without works faith is dead. God is all about freedom, he will give you opportunity to serve him over and over. You get to decide how to serve. No wrong choices here. Jesus brought it out over and over in his parables that the faithful servant will be busy doing the will of God.

Be ready for Satan when you start. He hates faith, hope, love and anything that connects you with God. If your faith is in God then Satan has lost. If your faith is in yourself he has won. Satan will attack you when your hope is at its lowest point. Every time!

Maybe you have seen a glow stick before. They started out as toys for children but now they are much more. In an emergency they can be used for rescue or a safety marker on a kid’s bike. You will see them on Halloween so drivers can spot the trick or treaters. But they have been used by our military for several years in combat. The military version is infrared. Not visible to the eye without night vision. Our troops are the only ones that can see them. In a firefight at night they can spot friendly troops.

So what are the directions on the glow stick? They have to be broken to shine. Same directions work for Christians. We were broken and now we can shine! A believer filled with the knowledge of God will be filled with hope and shine for all to see!

2016 years ago you were given a present. You should have received by now. Maybe you have never opened your present or maybe you opened it but set it aside for later. Open and enjoy the best present ever given this year.


Friends

Friends

My parents knew how important they were years ago. When I was old enough to be trusted to leave the yard I would have to get permission first. This was one of the few occasions where forgiveness was NOT easier to get than permission. Whenever I asked to leave the next question was “Who will you be with?” It seemed that who I was with was more important to them than where I was going. It was a long time before I found out why.
My parents were old enough to know (I thought they were born old!) how much our friends shape our lives. Friends will set the standards that we live by. It won’t be in a written resolution but it will be obvious what they consider worthy goals and we will try to conform. Good friends enhance performance more than any other reward. We were built to connect, we want to connect and connecting with a quality friend is the best hope we have. As the saying goes “steel sharpens steel!”
Throughout my life my friends have proven to be a catalyst for everything that has happened. Sometimes they coached me to new heights. Sometimes they kept me from reaching a new low but they were always involved. My friends are very different but all are useful and enrich my life. I often pray that they can say the same about me. Or as I told my brother “I wish your brother was as good as mine!”
If you do something really good or reach a goal without friends you will feel like you haven’t done anything special. The joy from sharing with a friend is always better than the actual reward. Friends are that important. It is obvious that were designed to connect and once we do having a friend magnify every experience. Sharing the experience just makes it richer and much more important. That’s why the first thing we do when something happens is tell a friend.
It’s hard to imagine how bad a life would be without friends. You get up and weigh and you have lost 20 pounds. No one to tell. You get to work and you have been promoted. It’s just a day at work cause there no one that cares. You get a call from the doctor that your biopsy is back and you need to come in for a consultation and to bring a friend. You have to go alone. You wish you had someone. Doesn’t sound like much of a life does it?
When I was 19 I was a telephone man and I went to work on an old man’s phone. He was over 90 but his mind was sharp and his life had been full. He had lots of stories to tell. He was gassed in WWI and shot in WWII. He fell in love with a prostitute and married her. He loved her 30 years till she died in his arms. He had a friend in the war that was killed saving him when he was wounded. It seemed he had lived the equivalent of 3 lives in his 90 years. I stayed as long as I could but before I left I remember saying “It must be nice to live so long.” He sighed and said “Not really, you have to watch your friends die.” It didn’t sink in then but I have heard his words many times since then in my head. When you lose a friend you are diminished.
Friendships are certainly not the same. Some friends are experts at one thing and can help you in a certain field. Since I was involved with competitive shooting for most of my life I had several shooting friends. They wanted to shoot better than me but only if I was shooting my best. On the days when I shot on the wrong target or my gun gave trouble they took no joy in a better score. But when I had a good day they relished telling about firing a score even one point higher. They knew getting beat would make me work harder. They also knew me working harder would make them work harder. We improved each other. Steel sharpens steel. That’s what friends are all about.
Some friends are needy. They need more help than they can ever give back and have little to repay the “friend debt.” Somehow effort used to help a friend always get paid back. Maybe it is the sincerity of their thanks or it might the way we are wired but it always feels really good to help someone that can’t pay it back. When it is a friend it always feels like the right thing to do.
I recently read a story about a man that depended on friends. He made the hike on the Appalachian Trail. If you don’t know it is a mountain hiking trail that starts in Georgia and ends in Maine. It is over 2000 miles of foot travel. You carry what you need with you. There are shelters spaced a day apart but they only give you shelter from mountain weather which can be rather nasty. Most hikers trying to do the entire trail start in April in Georgia and follow the warm air north.
This man’s name is Trevor. He didn’t have anyone to hike the entire trail with so he would go as far as he could and then wait till the next group coming through would pass him sitting on the trail. He would ask if he could hike with them. Many said no but enough were willing to make friends with a stranger to keep him on the trail. He became the first blind person to make the hike from Georgia to Maine
Try to imagine sitting in the woods on a trail and hoping someone comes. What if nobody comes? Imagine hearing someone (or something!) approaching. Are they friendly? Are they good? Will they rob me? Will they leave me here? Will I be a tasty snack? Staking your life on your ability to make friends is a little unnerving.
We stake our lives on our ability to make friends so we better be good at it. We select our friends so we need to be good at assessing what a friend can do, can’t do, won’t do and will do. I must have had help selecting my friends because I don’t think I’m capable of getting the ones I have on my own. Only problem is they can’t be around all the time and I need help 24×7!
I need a friend that I can keep in my pocket. Someone that will be with me day and night ready to help. He needs to very smart, very interested in me, want the best for me even if it kills him. Someone that will never betray my trust and always have my back. This friend needs to add to my life and never take away. He will need to be patient, forgiving, kind, truthful and show me by example how I can be my best. Sounds like a pipe dream doesn’t it. I thought so too.
Imagine a friend you can summon in one second no matter where you are. With a fulltime friend like that on-call you could learn to rely on him a lot more. It would be so easy! All you have to do is look at the problem and ask “OK, what do I do?” A true friend will steer you clear of being self-centered because he knows that brings disaster in the end.
A true friend will tell what is best. It might not be what you want to hear but that is what makes it a “true friend.” Seems like that has been where I went wrong many times. I knew what a good friend would tell me to do but I did what I wanted instead of what was best.
There are people that live each day with a friend like that. They are called Christians. In one second they can have God with them. That is the easy part because he never leaves them anyway. Even though they have messed up God’s plan over and over he has forgiven them. And when they ask for forgiveness in the future he will forgive again. As long as the request is sincere and coupled with the hope to do it right next time.
It can go to your head to have friend that powerful. That’s Ok as long as you let it go to your heart too. This friend is a teacher and he does what all teachers do. They try to make their students like them. It won’t ever happen but the students can be the best version of their selves possible.
Having God for your best friend is God’s plan. He made us to connect with him. When we accept him fully we begin to understand how wonderful a friend truly is and it only gets better. We learn more with each passing day how God loves us, cares for us and protects us from evil.
As awesome as it is to have God as your best friend it only happens with an invitation. We are more blind than Trevor when it comes to life. We need to make that invitation and walk the trail to forever with God before we are left alone in darkness.

Long Range Shooting


Long Range Shooting School


Some things just seem too complicated at first glance so we just put them on the back burner till a better time comes along. Long range shooting must be one of these because it is rare to get new people to show up at a match unless an “old shooter” has brought them for the first time. Maybe performance anxiety or fear of finding out how bad they really shoot but a lot of people never get to enjoy the fun of doing something they once thought impossible, hitting a target with a bullet fired from a rifle 1000 yards away. Maybe the interest in long range shooting stirred up by the American Sniper movie will encourage a few more people to give it a try.

The sport of long range shooting has a rich history that dates back to the 1800’s. America distinguished itself early as a rifleman’s country in international competition and is currently the home of more gun owners and competition shooters than anywhere on earth.

Long range shooting is a true lifetime sport that will have senior competitors competing with open and junior class shooters without handicap. Not unusual to have a 70 year old man win a match and a 19 year old woman take second or vice versa. That won’t happen in any of the “ball sports”.

Maybe you are asking “exactly what is long range”? Well for the majority of shooters it means 1000 yard shooting. There are 600 yard matches and matches where we shoot 800, 900 and 1000 but the heart of long range is the 1000 yard line. That is around 5/8 of a mile and your bullet will be dropping over 30 feet. That would be hard to figure but you already know it will be 1000 yards for every shot. You also know when you come back next time that it will be 1000 yards every shot so you don’t have to find a “zero” and adjust but one time! Sounds easy already doesn’t it!

But what style of shooting will it be? It’s  a question that gets asked a lot. The answer is it’s your choice. You can shoot from a rest with a scope or try your hand at shooting prone while holding your rifle off the ground with the aid of a sling. Most long range matches are a combination of “F” class shooters and “sling” shooters. Since the time limits are the same this doesn’t pose any problems.

“F” class shooting is long range shooting using rest or sand bags on the ground. It might be called benchrest without a bench. The rifle can be supported front and rear on rest placed on the ground and any rifle any sight  combination is allowed.  F class shooters make up the bulk of the shooters attending our N.C. long range matches. A heavy barrel bolt action in a caliber like 6.5×284 or 6mm with a fast twist barrel and fitted with a 24 power scope would be right at home with this group. Since the rifle is rested and the distance doesn’t change the competition is centered around having the most accurate rifle, loading the most accurate ammunition and reading the wind changes that cause the bullet to deflect left and right.

“Sling” shooters are basically NRA highpower competitors. They shoot from the prone position and the rifle must be supported by the shooter. It take a little more practice to learn how to maintain a good position but the idea is the same. The scoring rings are larger since the rifles are held and not rested. Sling shooters are shooting rifles equipped with open sights most of the time. While this sounds impossible the open sights are very refined and used to center on a black circle in the middle of a white background. It also helps that our ranges face north so the targets are in the sun. Most long range matches will have events for open sights and scope sighted rifles. Usually the scores are almost identical or only separated by a few points. Sling shooters have more shooting opportunities. They shoot in regular highpower matches, Palma matches and Fullbore matches.

Palma is a special long range match fired between the English speaking countries of the world in a host country every 4 years. The format is 15 shots from the 800, 900, and 1000yard line. Rifles must be 308 Winchester caliber and bullets over 156 grains are prohibited. Open sights only

Fullbore is new to the U.S. It is fired from 300 to 1000 yards and with 308 rifles and open sights only. It has it’s roots in military competition and is the most popular long range match for most of the countries that allow rifle shooting. The targets are challenging and it is all fired prone position slow fire. Slow fire means the target is pulled down and scored each shot. All long range shooting of all types are slow fire events. You can use a semi auto but you will only load one at a time.


You will find a lot of different caliber rifles being fired at 1000 yards but the majority will be 308 Winchester and 6.5×284. Most will be bolt actions with long heavy barrels and stocks with features to make them easier to shoot from the prone position. Except for Palma and Fullbore you are not restricted by caliber. Since you cannot use a muzzle brake to vent your muzzle blast and recoil on your competitor lying next to you you might enjoy something less than the largest thing your action will handle. Remember you don’t have to kill the target, only hit it!

Bullet selection will depend on the caliber and barrel but usually it will be a boat tail match bullet chosen for it’s ability to be less deflected by side wind during flight to the target. I always like to save a lot of head scratching and just copy what the winners are using. Once you win you can start looking for something better. By then you should know enough about the sport to make better decisions.

The other equipment needed will consist of a ammo, spotting scope, a ground mat, sunblock, some snacks and drinks and any other comfort items. Position shooters or “sling shooters” will need shooting coats and gloves to help keep them steady and protect from recoil. That rifle didn’t seem to kick when you shot that deer last year but you will firing it close to 100 times at the match each day.

Since it is hard to describe every type of long range shooting I will just try to describe how to try shooting a 1000 yard match with a local club. The closest one for  eastern North Carolina and me is the Coastal Carolina Rifle Club.

So what kind of rifle will you need? The rules allow several but if you have never been to a match or don’t have a friend to help you it is probably best to go and observe the first time. Shooters love to talk and they love new shooters that want to try so you will find lots of advice. You can shoot old military rifles like an M1 Garand or a tricked out match rifle. You can spend a lot or a little but a shooter that shoots anything learns more than one that stays home and talks about shooting.


Entry in the match is easy. First look at the club web site. coastalcarolinarifleclub.com. Check out the club information and pick an upcoming match. The range is on base at Stones Bay and it is an active USMC range where Marines shoot most week days. Access is restricted so you will need to email your intentions and vehicle information at least 10 days prior so a pass can be made available at the sentry gate. You simply stop at the gate, show your ID and pick up your pass. The Marines are great host and very accommodating.

Next you drive to the 1000 yard range and go to the range house to enter and get your target assignments. You will pay an entry fee and usually a target puller fee. Having a paid target puller allows the shooter more time to prepare and enjoy a leisurely day. It is without question money well spent.

Normally each target will have 4 shooters assigned. Relay 1 will shoot first. Relay 2 will assist the shooter during sighting and record the hits on a score sheet. Relay 3 and 4 will be waiting in the area behind the firing line or operating the target if no paid target pullers are available. Relay 2 shoots next while relay 1 scores and 3 and 4 are still idle. When relay 2 is finished 3 and 4 come to the firing line while 1 and 2 rest and prepare.

Most 1000 yard matches are fired with a 30 minute time limit. Shooters are allowed unlimited sighting shots to get on target and the score keeper can assist. The target is pulled down in a pit and a white disc is inserted in the shot hole. When the target is raised the shooter can see where the shot impacted and adjust as needed. When the next shot is fired the target is pulled and the spotting disc is moved to the new shot hole. The old impact is covered with a paster and the process is repeated. The shooter will tell the score keeper when he is ready to begin shooting the 20 rounds for score.

Once the shooter has started firing the shots for record the score keeper cannot assist or coach the shooter since this is an individual competition. Team matches are the only time a shooter can get advice on adjusting sights, wind changes or other help. Many shooters fire 5 or 6 rounds before “going for record” but if it takes as many as 10 it will be hard to complete the 20 record shots before the time expires. Extra time will be given if the target breaks or is slow but not for taking too long to shoot.

For F class shooters the ability to hold the rifle steady on target no problem since it is rested but firing from rest brings its own peculiar set of difficulties. Rifles powerful enough to be accurate at 1000 yards are going to recoil. This recoil must be handled the same each shot to get good accuracy. You can’t change any pressure on the rifle without affecting accuracy. It is like shooting a tuning fork.

Once shooters learn how to shoot regardless of sling or rested they must learn to compensate for wind deflection. A 10 MPH wind will move a 308 bullet 100 inches when it is blowing from the side (full value). Since the 10 ring on the target is 20 inches and you are aiming at the middle it is only 10 inches from the middle to the 9 ring. So if everything else is perfect and the wind changes over an average of 1 mph you will shoot a nine!

1000 yard wind reading is a subject that deserves it’s own article but here is the short version. The sights or scope will have adjustments that are made to move the strike of the bullet 1/4 minute of angle per click. That equals 2.5 inches at 1000 yards. You look at the angle the wind is blowing in relation to the bullet flight. Straight in the face at 12 o’clock or at behind at 6 o’clock  has zero value, across the range from a 3 or 9 o’clock has full value.

Here is an example. 1000 yard with an eight mph average wind coming in around 2 o’clock. It is hitting the flight of the bullet around a 45 degree angle and will be a half value wind. It will move the bullet strike 40 inches to the left. You will adjust 16 clicks to the right ( 1/4 minute adjustments) for a center hit.

While it is impossible for most shooters to find a 1000 yard range to use for practice a lot of training can be done at short range. Reduced targets are available to simulate for 1000 yard shooting at 100, 200 or 300 yards. A good 22 target rifle fitted with scope or open sight will teach the basics of position shooting with a sling and help you build a good prone position. Even match air rifle at 10 meters prone will make you a better 1000 yard shooter.

One of the most important things to find for a shooter is a shooting buddy. This should be someone close to your ability so your natural competitive desire will encourage you to practice. Having someone to travel to matches, listen to your ideas and push you a little when you want to find an easier sport will have a wonderful effect on your shooting and add to your fun. Hopefully you will do the same for your buddy!


Timothy P. Whealton

What will we wear in Heaven


What will we wear in Heaven?

(Written in June 2015)

It was a little over a year ago when the Chaplin asked if we needed any help with anything. My sister had been silent but suddenly said she said she had some questions about Heaven. When the Chaplin said “please let me help” her question was “what will we wear in Heaven”? I could tell he was not expecting this question. When he asked her to clarify she wanted to know if we would all wear white robes in Heaven or be naked or have outfits? If we had outfits would we wear the same thing forever or would you change each day? Could you wear more than one outfit a day. Were there places to shop for clothes or were they provided? What about shoes? I could tell the Chaplin had spent his time telling people how to get to heaven but like the rest of us he really couldn’t  say what we would be doing on a daily basis. I didn’t want to confound the poor Chaplin with more than he could handle but I had questions too. I wanted to know what we would do each day but I already knew what we would wear.

I have always been blessed to be a dreamer. While I’m awake I can dream up all sorts of things but it is when I’m asleep that I really show off. One night I might be a war correspondent gathering information during a complicated global conflict or maybe a sailor gliding over beautiful blue green water. I just don’t know till I go to sleep but I do know it is usually a great way to spend the night. I rarely have disturbing dreams. I have had a few but even those were not crazy or what you would call nightmares. Most are enjoyable, some enlightening and some down right funny.

Like the time I dreamed I was black. I dreamed I was in bed and my Mother ( who was a large black woman) came and opened the bedroom door and told me to get up out of that bed and do what she had told me to do. That was when I looked at my hands and realized my hands were black. I had never thought about being black so I don’t know where that dream came from. When I told my friend Johnny at the shop about it he said “I wouldn’t have been looking at my hands”.

In spite of an amazing ability to dream while asleep the most amazing sight I ever had in my mind came while I was awake. I don’t know if is correct to call it a vision or a daydream but I know what I saw and it has remained clear for 26 years. I didn’t discuss it for many years because I didn’t want people to think I was crazy but I don’t think I can hide that anymore so I will share. Maybe there is someone that needs to hear it. God has a way of shining his light on something and letting it help someone.

It was on my birthday in 1989. I was shooting in a rifle match in Butner with the National Guard team. The Guard never cared if it was your birthday when they made the schedule. I was on the firing line when a police officer from Butner Public Safety drove up and asked if Tim Whealton was there. I immediately had that sick feeling you get in the pit of your stomach. He told me they had been notified that my mother was in the hospital in New Bern and not doing well. I left the range and started the 3 hour drive to New Bern. On the way I found out Mom had suffered a heart attack and cardiac arrest. She had been resuscitated in the ambulance and was alive on a ventilator. If you knew my Mom you knew this was the worst case scenario. She had retired as a hospital nurse and always let us know to never resuscitate her or allow her to be kept alive with no hope recovery. The ambulance crew had no way of knowing this and they did what they were supposed to do. Experienced ambulance crews will look for reasons to not do CPR but standing orders are clear, when in doubt resuscitate.

I thought about when I had called to check on her a few days before. I had asked her what she was doing and her reply was like so many times before, “just sitting here waiting for Jesus to say “come on Bessie!” That was my Mom. She had worn out her body and was ready to see her Lord and if you knew her of this you had no doubts.

When I arrived at the hospital my family was already there in the family waiting area outside the cardiac unit. The doctors came out and gave us the grim news. Her heart was beating but she was brain damaged with no hope of recovery. Even though each of us knew exactly what she would want us to do it was amazing how hard it was to say it was time to turn off the ventilator. In the back of our minds I’m sure we thought about those stories of people waking up but this was reality and we had to be strong for her and each other. She had raised us to be ready and we all agreed. After we signed the consent we waited in the family area in silence. That was when I had my vision.

I was sitting with my eyes closed and suddenly I was in the cardiac unit looking down the hall. I saw my mother come out of her room and start walking down the hall towards me. Even though she was coming towards me she wasn’t coming to me in particular. She had the most beautiful smile on her face and she was wearing a conservative gray outfit that fit well. As she walked past the open rooms she waved goodbye and smiled. With every step she seemed to be aging in reverse and was becoming more beautiful. Suddenly her progress was stopped and hands were on her shoulders. Her smile was gone and a look of fear came over her face. I was back in the waiting room.

I waited in silence with the others and after a long time the doctor came out with news. They had removed the ventilator and she wasn’t breathing but after a period of a couple of minutes she had started breathing on her own. Apparently there was enough brain function to make her breathe but nothing else. There was no way to predict how long this could go on but it was the worse case scenario. Four days later, late at night the angels came and she got to leave for good. I know exactly what she was wearing and how she looked.

I’m convinced you get to wear what you want. Just make sure you get there!


Timothy P. Whealton