
Barrel Setbacks
A lot of shooters may not be familiar with the term. I’m talking about removing a rifle barrel and cutting off the chamber and then cutting a new chamber and replacing. Sometimes it is done to correct headspace but usually as a way to give new life to a barrel that has fired enough rounds that accuracy has started to suffer. For the hunter it has little use. Most magnums will go over 1000 to 1500 rounds before groups start to open and normal calibers like the 308 might go 3000. That’s a lot of deer to skin. An active highpower competitor will shoot a match a month (200 rounds) and practice another 100. If the shooter can get another 3000 rounds it makes good sense to do a setback.
The portion of the barrel that wears out is the throat. The throat is a very short section of the barrel that has the rifling removed so the bullet can be loaded into the bore. In most rifles it is less than 3/8” long. When the cartridge is fired the burning and unburned powder erupt from the case like a hot sandblaster. This erodes the rifling and wears out the leading edge of the rifling. A casting made of the throat section or a careful inspection with a borescope will reveal the wear. When the bullet leaves the cartridge and jumps to the rifling it must contact all the lands at the same time or the bullet will enter the rifling crooked. If it enters crooked it stays crooked and exits spinning off center. When anything spinning 150,000 rpms is off center bad things happen!
Most target barrels are made with a large diameter so setting back will not be a problem. The amount to set back can be as short as one thread (.0625) to correct headspace or a couple inches. Normally I set back the length of the trunnion which will be around ¾ inch. That way I don’t have to worry with the existing threads and just cut new ones. ¾ inch will remove all the throat erosion and give a good job.
The pictures are from a job where I used a takeoff barrel from a tactical rifle and installed it on a Remington 700. The action was blueprinted and this called for rethreading .010 oversize so the threads on the barrel would be undersize. After cutting off the trunnion the barrel was centered in the 4 jaw chuck and the muzzle was centered on the cathead on the outside of the lathe.
Next the receiver was measured and recorded so I would know what size to make the trunnion (threaded portion). I measure twice to reduce errors!
From here on its just like installing a new barrel. Turn to size, thread, cut bolt recess, chamber, debur and reassemble.
If you are new to machine work practice threading till you can do it in your sleep. Use old barrels, cut off round stock and anything else. Take a course at the college and tell the teacher you just want to cut perfect threads. It will be time well spent.
Figure 1 centering in the cathead
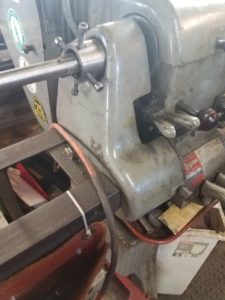
Figure 2 centered in the 4 jaw
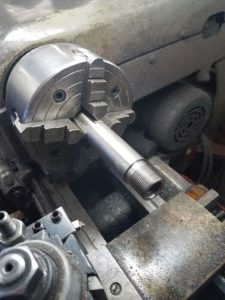
Figure 3 Cutting off the trunnion can be done with a cutoff tool but the saw is faster
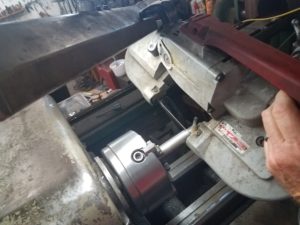
Figure 4 Time to make a new trunnion
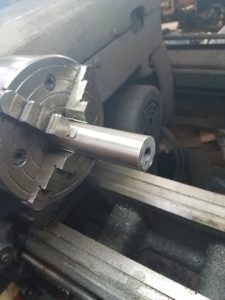
Figure 5Measure carefully
Figure 6record your measurements
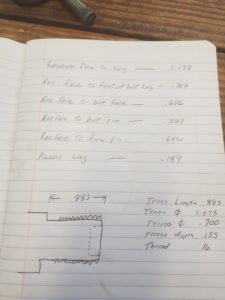
Figure 7turning the trunnion to size
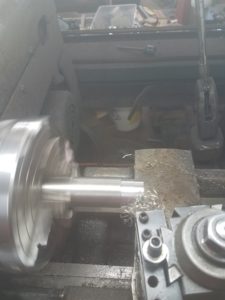
Figure 8finished and ready for threading
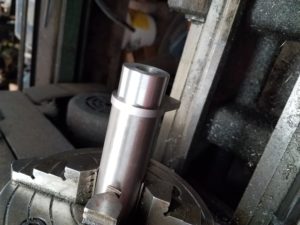
Figure 9Perfect threads!
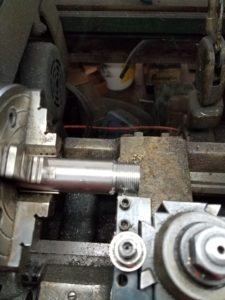
Figure 10 The receiver is the go gauge for the threads
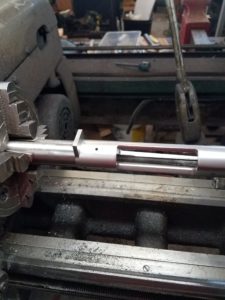
Figure 11 Chamber cut within .100 of final depth and go headspace gauge inserted
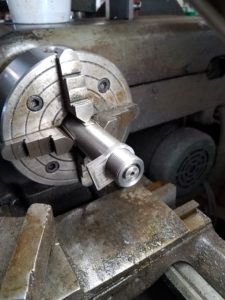
Figure 12 Action closed on go gauge and gap measured between barrel and receiver with feeler gauge. This tells you how much deeper to cut the chamber
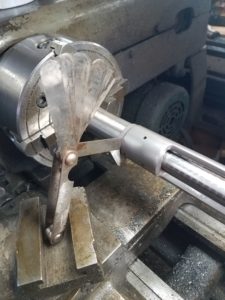
Figure 13 With the tailstock ram locked the entire tailstock is pushed while watching the dial indicator and the final chamber depth can be cut within .001
