Concealed Weapon Class Sep 23rd 2017 8am

My next class will be Saturday the 23rd of September 2017. I supply the guns and ammo (even lunch!). You don’t need to get or do anything but show up ready to learn.

So why should you drive to Cove City and take my class? Because if you are going to have a gun you should know how to use it correctly and within the law.

As a gunsmith and firearms trainer for over 40 years I have witnessed countless people struggle with their firearms. Maybe they bought the wrong gun but usually its just a matter of training. Most people will lie about their past when it comes to guns. A lot will say “my Daddy taught me how to handle a gun” when in reality he put the gun in their hand and said be careful. You are getting a gun so you will be safer. What a shame if the gun you bought to make you safer does the opposite and now you are the biggest threat your family and friends will face! Safety is absolutely paramount in my class and will become second nature only through training.

There are over 20000 firearm laws in the US. Exactly when does the law allow you to point your firearm?. Exactly when can you shoot? My class will leave you with no doubts as to where you can carry, how to carry and when you can shoot.

No single class can make you proficient with a firearm but in one class you can learn the correct way to train and practice with your gun. You will learn how far away you can accurately hit a target. You will get instant feedback from reactive targets.  You will learn how to engage multiple targets and get to try different types of handguns. You will also get a demonstration of shotgun and rifle use as a they relate to home defense.

For years I shot as a member of several military teams in competition.  We competed with combat rifles and pistols as well as match weapons. Several times we won national competitions. When teams were not competing we were training ourselves and instructing new shooters.  In the process I became double distinguished and a double high master. When I wasn’t shooting or training I was gunsmithing. Put a lifetime of training to work for you and learn what you need to know to survive and protect the ones you love.

It may be the most important $100 you spend

Tim Whealton 2526357246

freebore, throats and bullet jump


Freebore, Throats and Bullet Jump


Wow, you broke the bank and went all out to build that super gun and when you went to the range some old codger shot a smaller group than you with his lever gun! It happens all too often but why does one gun shoot better? It might be the first ¼ inch of the long trip to the target that’s the problem.

Even before shooting progressed to breech loading cartridge guns shooters had discovered how important it was to have the bullet enter the rifling straight. Early muzzle loading target rifles had false muzzles that attached to the barrel for loading. The false muzzle was bored and tapered to gently center the bullet and guide it into the rifling. Even after switching over to breech loaders most accuracy enthusiast would load the bullet from the muzzle and only have powder in the cartridge. Why did they go to so much trouble? Because it made a difference. The ones that didn’t load from the muzzle used special tools to seat the bullet in the rifling (called breech seaters) and then loaded the cartridge with powder and a paper card atop the powder to hold it in place.

After jacketed bullets became commonplace muzzle loading was no longer possible due to it being impossible to push the jacketed bullet down the barrel. Modern guns blow the bullet out of the case and it hits the rifling hopefully straight enough to enter and start spinning on center. If a bullet enters the rifling crooked it can’t straighten up. Since the average rifle bullet is spinning over 200,000 rpms you can imagine how much effect this has. The effect is more pronounced as the range increases.


So how do we get our bullets started straight? We reduce the tolerances as much as possible and make sure everything is straight. In benchrest rifles we make the neck portion of the chamber slightly undersize and turn our brass to just slide in with zero tolerance. This is good as long as experienced handloaders make the ammo. If such a gun has a standard round of ammo loaded in the chamber it acts like a clamp on the bullet and chamber pressure goes into the danger zone.

After doing the best we can with the neck we turn our attention to the throat. The throat is a short section of barrel at the end of the chamber where the rifling has been removed. The throat allows a bullet to be loaded into the bore. Without a throat the bullets would hit against the rifling and keep the round from going into the chamber. The throat doesn’t have to be the length of the entire bullet, only the length of the bearing section on the bullet that protrudes from the cartridge. In most rifles it is around ¼ of an inch. If the throat is longer the bullet will have more problems maintaining alignment coming from cartridge case to rifling. In most guns the bullet engages rifling before the base of the bearing section has exited the case. If the throat is not concentric and some rifling remains on one side the bullet will be pushed off center. This is a frequent problems and hard to detect unless you know how to look.

Figure 25The 155Palma bullet has a short bearing section. The throat can be shorter

My favorite way to check the throat is to make a casting of the throat with cerrosafe metal. It is a low temperature metal that looks like lead but melts at 180 degrees. I get mine at Brownells. Just plug the bore with a bit of paper towel in front of the throat and pour in a little metal through the breech. No need to fill the chamber. You are only interested in the throat. Tap it out from the muzzle and you have a faithful reproduction of the throat. You want to see that the rifling starts at the same distance from the chamber. This is also a good time to measure the neck diameter and bore diameter


Figure 26The throat is clearly visible on this Weatherby 7mm mag. This is what is called freebore.


If your throat looks uneven you might be able to cut the throat deeper and get it concentric. This is done with the throating reamer and can be done by hand however the best work will be placing the barrel in the lathe and using the tailstock to hold the reamer. Remember you are only cutting the rifling so it won’t take much effort to cut away too much. The cure for the deep throat is cutting off the chamber and setting the barrel back. A lot of work.

So what if you have a “deep throat” and just leave it. Depending on your objectives you might be happy with it. The famous Weatherby Magnums were designed with deep throats to get more velocity. It is called freebore. It works sort of like this: burning rate on powder goes up as pressure rises. When the pressure rises enough to push the bullet out of the case and into the rifling it has the same effect as making the case larger and this will drop the pressure. This allows rifles with deep throats to be loaded with more powder and achieve higher velocities. Accuracy is not enhanced but if you are shooting a deer you (or the deer) won’t know the difference. You can do this at any time with a throating reamer or the rifle will do it for you as you continue to shoot. A 243 Winchester will have the bullets fall out of the case before touching rifling around 2000 rounds. That’s a lot of deer to be skinned but only one moderate season for a highpower match shooter.

For the gunsmith you need to understand where the throat is, what effect it has on accuracy and velocity. How to repair or correct it. And how to explain it to your customer.


Drill and tap

Drilling Holes in Firearms


The man comes into the gun shop and ask “How much to drill and tap a couple of holes in my rifle”. Ten dollars for the holes, fifteen for the threads and twenty for putting them in the right spot the first time! Then you need to smile and make sure you didn’t make him mad but you really told the truth. Like so many machine shop operations it is the setup that really eats up the time and requires the knowledge.

Normally we are talking scope mounts when drilling and tapping so it is like putting pistol sights on a 25 auto that will be sighted in at 200 yards. Huh? Look at the front and rear scope bases, now imagine they are a front and rear sight. Just like adjusting sights, the closer they are together the more the bullet impact is shifted. Most modern scope mounts will move the bullet one minute of angle when the base is moved .002″. A hair from your head will usually measure .005 so to center a scope on a rifle literally requires you to do better than splitting a hair!

Maybe the first job is to decide if the gun should be drilled and tapped at all. If the gun has true collector value it might be wise to leave it as is. Old Winchesters and such will lose value if modified in any way. Still some owner will insist on mounting a scope and after all it is their gun. Just do your best to let the owner know so they can make an informed decision.

Next is the actual layout and selection of mounts and bases. The cheapest is rarely the best and this applies to mounts as well. Try to select something that will look good and hold securely. Most of the time the owner preference will be the deciding factor but you might be able to guide him to a better choice if you are well informed. Most manufacturers supply charts to tell you which model base fits which firearm. Be aware that sometimes the are slight differences between models that can require a different mount. Sometimes you can modify bases for special applications or the correct things that went wrong from the past like a hole drilled off center.

Now you have the scope, bases, rings and barreled action. This would be a good time to center the reticule in the scope. Find a small cardboard box and notch the sides so the scope will rest in the notches with the adjustment knobs between the notches. Now slowly rotate the scope tube while looking through the scope at a distant object. When you have adjusted the scope so that the center of the reticule no longer moves as the body is rotated the reticule is centered. This is important because the scope performs best when you are looking through the center and it leaves plenty of adjustment for sighting in.

Now you can layout the bases on the receiver and make sure the bases look correct and the holes to be drilled will not be in bad locations like on the face of the bolt lug shoulder or through a working part attached to the top of the receiver. A lot of 22 rifles have bullet guides and such mounted in the top that can be avoided by moving the front or back a small amount. Just make sure the final location you select will work with the scope. Sometimes an extension ring can solve problems with base spacing. Using a pencil or tiny scribe marks go ahead and mark the locations of the bases for a reference.

If you have a Forster jig for drilling and tapping you can mount it on the drill press or milling machine and follow your directions for securing the barrel action and the jig to the machine. I can’t imagine doing this type work professionally without this jig. It make jobs that are difficult almost easy and saves so much time that it easily pays for itself in a few jobs. I have looked at other jigs through the years but have not found one that equals the Forster. Not saying there isn’t one but I haven’t seen it. It makes sure the holes are drilled in reference to the center of the barrel, makes sure the hole spacing is correct, makes sure the tap is held straight and serves as a depth stop for holes that can go all the way through. While holes that go through are preferred because broken taps can be removed a little better sometimes it isn’t possible and can be extremely dangerous to go through. A screw going into a chamber can turn a 6/48 base screw into a bullet that will go through a scope body and can injure a shooter. I have seen this more than once!

If you don’t have a jig of any type and are determined to drill and tap anyway I have a method for that too. Assemble the rings and bases to the scope you centered earlier. Now set the assembly on the receiver where you want it to go. A collimator or boresighter can should be used to make sure all is properly aligned. If you don’t have a bore sighting device you can look through the bore at a distant object and align the scope accordingly. Don’t forget if this is a long range target gun that you might want to allow for extreme drop. Many long range bases have 20 minutes of elevation built in the base. After making sure it will work in this location mix up a little five-minute epoxy. Now place a small dot of this epoxy between the receiver and base and don’t disturb until tomorrow. Yes, it said five minute but you want the maximum strength. Now remove the rings from the bases. Now select a drill the size of the screw heads and lightly turn this in the screw holes in the base. This will remove the extra epoxy and mark the center of the hole in the base on the receiver with a small start on the hole on the receiver. Now pop off the epoxied base with a plastic mallet and the receiver is ready to be drilled. The holes are started and it is fairly simple to keep the drill in the right location.

This jobs are high in nuisance value and eat up considerable time for the gunsmith. They also carry the threat of a lot of bad publicity if done poorly. Thankfully it has become a rare job for the gunsmith but it still shows up at the gunshop from time to time so a gunsmith will need to master getting holes in the right location. Remember it is less than splitting a hair! Do good work!


Timothy P. Whealton


Barrel Setbacks

Barrel Setbacks

A lot of shooters may not be familiar with the term. I’m talking about removing a rifle barrel and cutting off the chamber and then cutting a new chamber and replacing. Sometimes it is done to correct headspace but usually as a way to give new life to a barrel that has fired enough rounds that accuracy has started to suffer. For the hunter it has little use. Most magnums will go over 1000 to 1500 rounds before groups start to open and normal calibers like the 308 might go 3000. That’s a lot of deer to skin. An active highpower competitor will shoot a match a month (200 rounds) and practice another 100. If the shooter can get another 3000 rounds it makes good sense to do a setback.
The portion of the barrel that wears out is the throat. The throat is a very short section of the barrel that has the rifling removed so the bullet can be loaded into the bore. In most rifles it is less than 3/8” long. When the cartridge is fired the burning and unburned powder erupt from the case like a hot sandblaster. This erodes the rifling and wears out the leading edge of the rifling. A casting made of the throat section or a careful inspection with a borescope will reveal the wear. When the bullet leaves the cartridge and jumps to the rifling it must contact all the lands at the same time or the bullet will enter the rifling crooked. If it enters crooked it stays crooked and exits spinning off center. When anything spinning 150,000 rpms is off center bad things happen!
Most target barrels are made with a large diameter so setting back will not be a problem. The amount to set back can be as short as one thread (.0625) to correct headspace or a couple inches. Normally I set back the length of the trunnion which will be around ¾ inch. That way I don’t have to worry with the existing threads and just cut new ones. ¾ inch will remove all the throat erosion and give a good job.
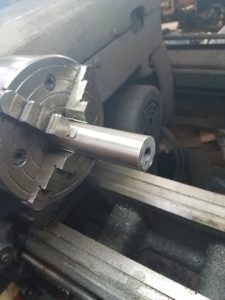
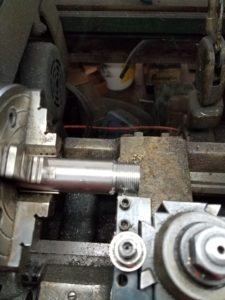
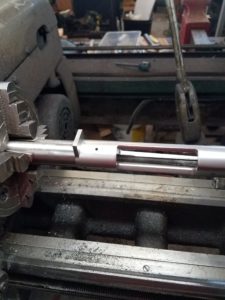
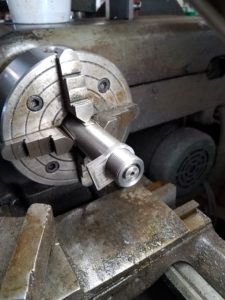
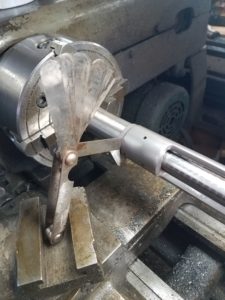
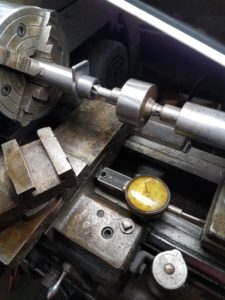
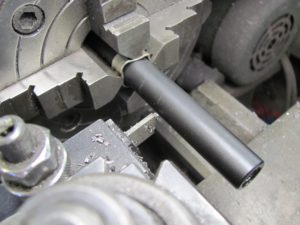
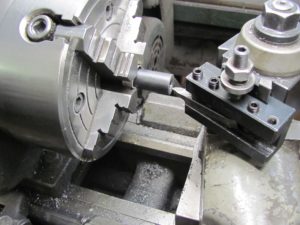
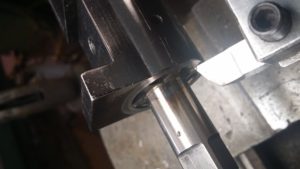
The pictures are from a job where I used a takeoff barrel from a tactical rifle and installed it on a Remington 700. The action was blueprinted and this called for rethreading .010 oversize so the threads on the barrel would be undersize. After cutting off the trunnion the barrel was centered in the 4 jaw chuck and the muzzle was centered on the cathead on the outside of the lathe.
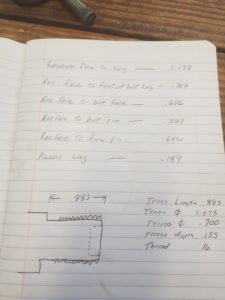
Next the receiver was measured and recorded so I would know what size to make the trunnion (threaded portion). I measure twice to reduce errors!
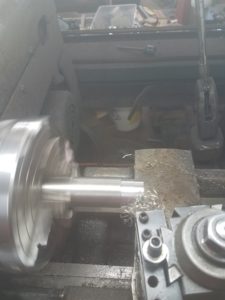
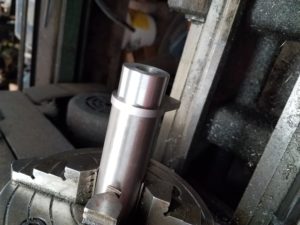
From here on its just like installing a new barrel. Turn to size, thread, cut bolt recess, chamber, debur and reassemble.
If you are new to machine work practice threading till you can do it in your sleep. Use old barrels, cut off round stock and anything else. Take a course at the college and tell the teacher you just want to cut perfect threads. It will be time well spent.

Figure 1 centering in the cathead

Figure 2 centered in the 4 jaw

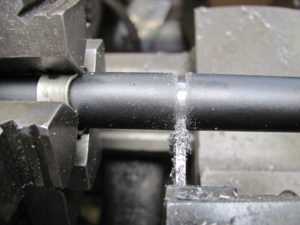
Figure 3 Cutting off the trunnion can be done with a cutoff tool but the saw is faster

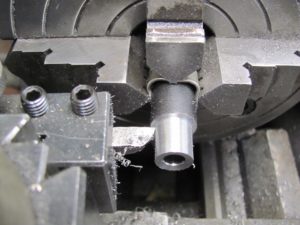
Figure 4 Time to make a new trunnion


Figure 5Measure carefully

Figure 6record your measurements

Figure 7turning the trunnion to size

Figure 8finished and ready for threading

Figure 9Perfect threads!

Figure 10 The receiver is the go gauge for the threads

Figure 11 Chamber cut within .100 of final depth and go headspace gauge inserted

Figure 12 Action closed on go gauge and gap measured between barrel and receiver with feeler gauge. This tells you how much deeper to cut the chamber

Figure 13 With the tailstock ram locked the entire tailstock is pushed while watching the dial indicator and the final chamber depth can be cut within .001


Sunday School @ Cedar Island 8/21/17


The Good Samaritan


The line of questioning was started by a lawyer. Not the kind of lawyer that gets you out off with a suspended sentence but an expert in interpreting Old Testament law. What the Jews called the Torah. It’s in Luke 10:25 if you are a Bible person. The question he asked Jesus was “master, what shall I do to inherit eternal life?” Jesus did what great teachers, psychiatrist and lawyers do. He answered with a question. Now this wasn’t strange or odd for Jesus.

Jesus was asked 183 questions in the bible. Anybody know how many he answered with a straight answer? That’s right! 3 times he gave a straight answer. He would either answer with a question or a parable. I can see the disciples start rolling their eyes at each other as if to say “not another story”! Jesus even apologized to them for speaking in parables and explained that later he wouldn’t have to speak in parables and he could just tell them. Ever wonder why? I think Jesus was speaking to all that would be hearing his word for thousands of years to come. The parable survives translation when the translated word changes meaning. In other words he did it for us and they just had to put up with it. Like when I was a phone man and my kids wanted money, first they had to listen to the “up the pole story” about how I had to climb that big pole to get my money. (They hated that story!)

So Jesus reply was “what does the law say and how do you read it”. He knew this man was a Pharisee and that he had years of study. He also knew this man wanted to show others how much he knew. The lawyers answer was straight out of the Old Testament. Love God with all your heart, all your soul, all your strength and all your mind and love your neighbor as yourself. Jesus praised his answer and said do this and you will live.

The lawyer had it made but he had to ask one more question to justify himself. He asked “and who is my neighbor?”
It’s a valid question. Where do we draw that circle? If I’m willing to help others but I only have a little money and limited hours how do I draw that line and exactly where do I draw it? Around my family? (Sure!) Cousins? 2nd cousins? Friends I see every week or once a year? I want to be generous but I have to live within my means. (And sometimes mean is an accurate description). Jesus was ready with one of his most famous stories. Even if you didn’t grow up as a God Bible Jesus person you have heard this story or at least the name, The Good Samaritan.

So why did this story stick? A Samaritan was a person from Samaria. It was a country next to Israel. They never got along with the Jews and even had war and race riots. Samaritan was used as a term of slander and to degrade. Their name was used for dirty jokes and to suggest you were a Samaritan would be “fighting words.” So let’s fast forward 2000 years. The Samaritans are gone, absorbed into other cultures but the name has a wonderful connotation when used to describe a caring person. The Jews are still here but calling someone “the good Jew” just doesn’t work the same.

Jesus was the master at telling a story that would pull you out of your comfort zone (he still is!). He knew all about racial bias and discrimination. His parable of The Good Samaritan used this to full effect. It was told in the well-known version of three. The people listening in that day knew the third person would be the one to help. They were caught off guard when it was a person they would never have a conversation or a cup of coffee with. There are a few more things you need to know about their world to see this story like they did.

The Times- Times were bad! The wealth was not distributed. No middle class. All the wealth was in the hands of the wealthy 1%. Heavy tax burden led to farming communities having to sell their land and become tenant farmers on what had been their own land. Young men were not able to inherit and forced to work as field labor for subsistence wages. Nothing was working. In desperation many young men had left the work farms and joined outlaw bands living it the mountains. They robbed travelers and Romans. These outlaw bands were known as the Zealots but they were very disorganized. Most people listening to Jesus would have known someone who had turned to crime to survive or seen their children leave home to be robbers.

The Road- The road from Jerusalem to Jericho was 17 miles of rugged misery. Jerusalem is 2500 feet above sea level. Jericho is the lowest city on earth at 800 feet below sea level. The road was not much more than a foot path with switch backs, cliffs and caves. Perfect for ambush. They had a name for the road. It was known as “The Way of Blood.” Not a very appealing name. Imagine your GPS saying “turn right on blood road”.

The Priest- he was the first to see the injured naked man. Being a priest meant he was doing the “love God” thing. We hold our pastors to a higher level and they did too. Being a priest also meant he was a member of the Sadducees. They were basically pro Roman because that meant the wealth would stay where it was. They were in the top 1%. Jesus said he saw the man and moved to the other side of the road and passed by. What a disappointment.

The Levites- he was the second to see the man. Levites were experts on the law and most were Pharisees. They were basically not as well off as the Saducees or as pro Roman. They considered themselves very religious and entitled to God because they followed the law. They wanted anyone who didn’t obey the law to pay a price for being a sinner. The Levite passed by without helping. We don’t know why. Maybe he didn’t feel obligated because the injured man was a stranger. Maybe the victim was another race or he was in a hurry. Would he have helped if it had been someone in his family? Safe to say yes. How about someone that lived close by or someone he worshipped with? Probably he would have helped.

The Samaritan- Jesus knew all about the bias towards the Samaritans. As long as people have looked or sounded different we have had bias. It never came from God, it came from men. I’m sure Satan has enjoyed it. It is certainly still holding us back 2000 years later. The Samaritan looked on the injured man and felt compassion. Maybe he had suffered at the hands of others himself. It doesn’t sound like he was especially wealthy since he was traveling alone. No way had he had the resources to fix what was wrong with the world but he chose to act. He bandaged the man’s wounds. The people listening to this parable would have known what that meant. The Samaritan ripped off strips of his own clothing. He poured on oil and wine. This softened the wounds so they would heal and killed germs. He sat the injured man on his donkey and carried him to an inn. He stayed with him all night and fed him ice chips and pudding pops (just making sure you are listening). Next day he prepaid the innkeeper 2 days wages to take care of him. Then he told him if it required more he would pay him next time he was passing through.

When the story was over Jesus asked the lawyer which of the three was the man’s neighbor? The lawyer replied the one that showed mercy on him. Jesus didn’t need to elaborate so he closed with a simple “Go, and do likewise”.

You don’t have to know everything to know something so what does this demonstrate? We already know God wants us to love our neighbor but like the lawyer we have to draw a line. I’m going to take care of my family and do what I can for friends and distant relatives. Problem is that when I take care of those close to me I don’t show how great God is to anyone. When the love shown to another will never be “credited” or returned then you know it is plainly for God.

Notice that people will do something good just because it’s the right thing to do. This points to the existence of God. Nobody does something bad just because it’s the bad thing. They do bad things because they think it will bring them something they want. Either short term pleasure or money or power but not just because it’s the bad thing to do.

We have drawn our circles around who are willing to sacrifice our resources to help. That’s just a normal thing. Almighty God doesn’t have much use for normal. He will provide you with special opportunities to let the world see his love. You will know when it happens. His message will be loud and clear. When it happens you can almost hear God saying “Here is your chance, don’t pass it up!” It will be a neighbor completely outside your circle. There will be no payback in the life for loving this outside neighbor but you will be laying up fruit that will repay you forever. You will hear people say “you can’t take your wealth with you” but Jesus said you could. You just have to send ahead before you go!


Timothy P. Whealton


Having God in your life

Presence of God

I’m not addicted to TV but not too long ago I watched the Olympics with interest. It was certainly better than standard TV but that doesn’t say much. I watched the opening ceremony just to see what they looked like and the outfits. Then each night we watched a different event. It took a while but I finally decided the end of the events were the most interesting part. Just to see the look on their faces as they realized their dream had come true. Even the ones that didn’t medal seemed to be happy. Some showed disappointment but all projected that they were glad to represent their country and be a part of a great competition. You would think our highly paid professional athletes would show even more appreciation but I guess money changes things.
There was no doubt about it, the outpouring of emotion by those athletes could be felt through the television. Seems we have the ability to pick up emotions even faster than the flu virus. Many cried, unable to handle the flood of feelings. Many spectators cried for the same reason (especially the parents!). Seems people really like to get emotional about something they can see. Maybe that was why God was so focused on keeping his people from worshiping idols. It was a hard task to keep people from idol worship. It still is.
Long before Indiana Jones I was fascinated by the stories of the Ark of the covenants. It was a box built to hold the stone tablets inscribed by God with the Ten Commandments. Ten rules for his people to live by that would make them different from the rest of the world. The rules have never changed. While we have never lived by them in earnest have you ever wondered what the world would be like if we could?
Incredible wealth- No need for armies, tanks, planes and missiles. No need for Police Departments, FBI, SBI, CIA, Homeland Security, IRS or any enforcement of a law. As a matter of fact if you could follow the 10 you wouldn’t need the millions of laws written by man.
Incredible Health- All STD diseases gone. When a virgin marries a virgin they don’t have STDs! With so much wealth other diseases would be wiped out by fantastic research.
Incredible peace- No locks needed. No alarms. You live without fear of your fellow man. There is nothing to fear, you won’t be hurt by anyone and when you die you will live with God forever.
Incredible happiness- With so much health, wealth and peace it would be hard to not be happy all the time.
These are not vague projections but facts of life. We all know it would work. We all know we can’t do it. What a shame.
The Ark was used as a symbol of the presence of God. The presence of God is a powerful thing and the Ark reflected that. It was so powerful that they never knew how to handle it. Of course when anything has power someone will want to use it as a weapon. It proved to be a double edge sword.
Joshua used it as the Lord instructed and stopped the waters of the river Jordan to cross into the Promised Land. He used it again to defeat Jericho.
Years later the Israelites were in battle with the Philistines. Israel had sinned greatly and lost the favor of God. They were defeated by the Philistines and fear was in their hearts. They didn’t turn to God but went and got the Ark to use in battle against the Philistines. The Philistines killed thousands and captured the Ark. It was a bad time!
When the Philistines carried the Ark home they got a nasty surprise. God sent a plague against them. Those that didn’t die were struck with hemorrhoids. Now I’m sure if almighty God gives you hemorrhoids they are not going to be little! No surgery, no preparation H, no ice cubes. Eventually the Philistines send the Ark back to the Israelites. They even sent it home with an offering attached. The offering was 5 golden hemorrhoids and 5 golden mice. You can’t make up stories that good!
When the Jews receive the Ark from the Philistines they were happy. So happy they opened it and looked inside. 50,000 died for this transgression. Then they took the Ark to the house of Abinadab. It stayed there 20 years.
After King Saul died David became king and wanted the Ark to have a resting place in Jerusalem. He goes with a military detachment to retrieve the Ark. They load it on an ox cart and parade in front of the Ark. When the oxen stumble Uzzah reaches to steady the Ark and is struck dead. Parade over! David is scared to go any farther and decides to leave the Ark and go back till he can decide what to do. He leaves the Ark with Obed Edom the Gittite.
Obed was a Gittite which meant he was from the Philistine city of Gath. It also means he would have known about the Ark. I can only imagine his feeling knowing the same Ark that had killed thousands and plagued his hometown with hemorrhoids was going to be left with him!
Obed means “worships God” and it must have been a name he earned. Our Bible only says Obed and his house were blessed. Sources outside the Bible say all the women of his house gave birth every two weeks for the 3 months he kept the Ark. That would have been a blessing then in a world that ran on child labor. Obed honored the presence of God and worshipped Him.
David hears Obed is being blessed and decides it is safe to go get the Ark. This time he dances his heart out while musicians play as the Ark is moved. They stop every 6 paces and offer sacrifices. The Bible says David was dressed in linen. Linen was underwear and David’s wife was not happy to see her husband dancing in public. She tells David with great sarcasm that he has exposed himself in public and is a disgrace. David is not impressed by her and explains that he was dancing before God and worshipping him.
David stands out as someone who really worshipped God. In the true sense of worship he put aside his life and honored God. His example of worship is still valid. Even though he was flawed he still worshipped. He maintained a wonderful connection to God. A worshiper puts aside the self-centered life and focuses on the true greatness of God.
But what happens when we worship God. It seems counter intuitive but we have improvement in our lives. It would make sense that if we get what we want we will be happy. It also makes sense that the more we get the happier we will be. Only problem is we aren’t wired that way so it doesn’t work. We are designed to connect and that connection we get with God when we worship far outshines anything the world can offer.
Need proof? Look at the most devout Christians you can find. You will have to look because they don’t stand up and wave but they are there. Usually working away in some church program or maybe a soup kitchen. You might find her working in the church nursery. You might find him painting the church or raising money to help someone. They will tell you the source of everything good in their life including their happiness is God. They will take no credit for their success. Their fruit will be abundant.
We don’t have the Ark but we have the Holy Spirit. It is the presence of God in our lives. If we take time to worship we will be blessed. It may not be with childbirth every 2 weeks but if it is from God you know it will be good!

Muzzle Brakes

Muzzle Brakes


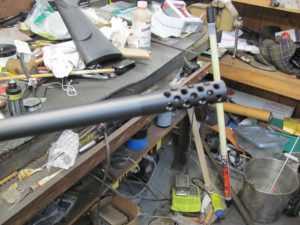
These things seem to go in and out of style like sideburns. Maybe a magazine article or a picture in something popular starts it and for a while I put on brakes. Then after a year or two with the darn thing they want it removed and recrowned like it was never there. After a few years as a professional gunsmith I quit telling people what I thought was best and just did what they wanted. If they want to know what I think I tell them. but only if they ask for it. In keeping with that statement let’s talk about what types of brakes are available and how to do a perfect job installing.

First you have to know how the brake reduces recoil. Recoil comes from two sources. The first is the equal and opposite reaction of the small piece of copper and lead being propelled down range. This is actually not all that much. After all most bullets are fairly light in weight. The second source of recoil is the jet of gasses that exit with the bullets. Did you ever take off in a jet airplane? This phenomena is the main source of recoil and can be reduced with a well-designed brake. The job of the brake is to divert these gasses to the sides with little remaining to exit out the front with the bullet. If the gasses are diverted equally all the way around they cancel out any push on the barrel and the effect is zero.

Some brakes take this a step farther and direct the gasses to the rear at a slight angle. This actually results in the brake being pushed forward and countering recoil. Unlimited class pistol used in speed events are probably the best example of this. They divert so much gas up and back that some of the pistols actually have negative recoil. When the pistol fires it pulls forward and down! I have never seen a rifle brake achieve this but they are very effective at reducing recoil overall.

So what is the down side? There has to be one or every rifle would have a brake. The down side is noise, not just some but lots of noise. If you shoot a magnum rifle with a muzzle brake even one time without hearing protection you will be convinced you have permeant hearing loss. In our area deer hunters use box stands and sometimes don’t hold the muzzle out the shooting port or hold just barely out to not spook game. It is like having two boxers punch you in the ear at the same time. You can also get this same effect if you get out of your truck and shoot holding the muzzle over the bed of the truck. It works like the cheerleaders megaphone. If you read the ads many claim to have the “quiet brake” but I haven’t found one.

I have machined my own brakes but it just takes too much time. Order the one the customer wants but make sure it is larger in diameter than the barrel so you can turn it down to fit the contour. I like the Shrewd brakes from Brownells and try to keep a few in stock since they will work for several size bores. These come with an exit hole for 22 so don’t forget to open up this hole .020 larger than bullet diameter.

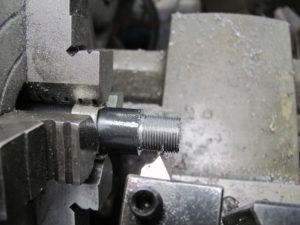
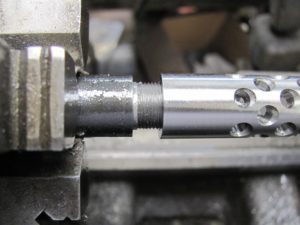
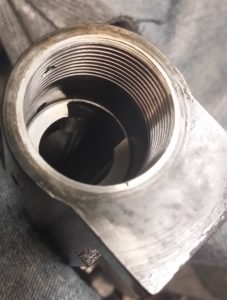
The machining of the barrel is very similar to the threading of the breech end into the receiver. These threads must be absolutely square with the bore so the muzzle is placed in the 4 jaw chuck and centered less than .001 thousandths. The other end must be centered inside the headstock or on the outboard end but some means. The threads must be beautiful little 60 degree angles and smooth to the touch. Take a lot of cleanup passes while you thread and understand that a cleanup pass removes metal too. The shoulder on the barrel must be absolutely square and maybe very very slightly undercut. This will make the seam disappear when the brake is tightened.

While the barrel is centered on each end and running true recut the crown as part of your job. It will only take a couple of minutes and you will probably help accuracy because what was there can’t be as good as your work. Use your favorite but make sure it is beautiful and free from burs. It might never be seen but so are the parts of the Rolex!

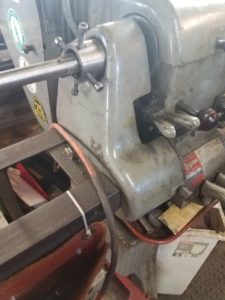
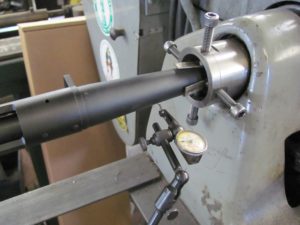
Figure 13The entire barrel has to be centered to make sure your work is in line with the bore. Here is the outboard end being centered. Note the soft copper shims to protect the barrel.

this is the outboard end and it must be on center. Adjust the 4 screws till it runs within .001


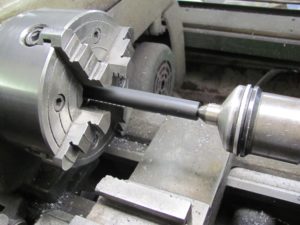
Figure 14 Holding the muzzle on the tailstock keeps it close to center while working on the outboard end.

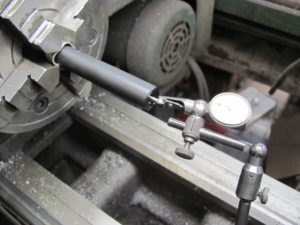
Figure 15The barrel must be centered on the bore.

Figure 16Measure how much you want to remove (if any) and how long you want the threaded tenon to be

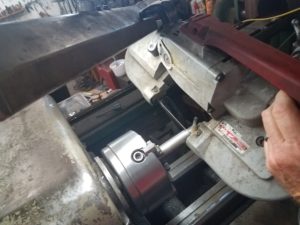
Figure 17 An electric bandsaw is faster but the cutoff tool works well if you are careful.

.
Figure 18 after cutting it is a simple operation to crown the barrel from the inside out. Note the compound set at 11 degrees.

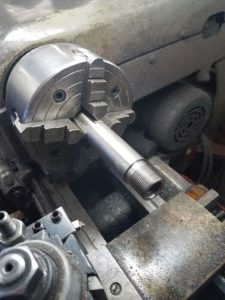
Figure 19 next the tenon is cut to size.

Figure 20 Practice threading on scrap stock till you can make perfect threads before you try this on a good barrel!


Figure 21 Use the brake as your thread gauge.

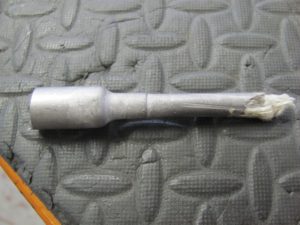
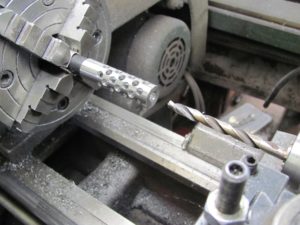
Figure 22 Make sure the exit hole is correct size for the caliber. I make mine .020″ larger than the bullet.


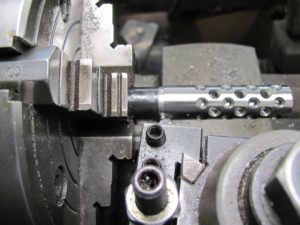
Figure 23 With the compound set at 5 degrees I taper the brake down to barrel diameter.


Figure 24 After matching barrel finish and bluing it is ready for the customer. Might be a good time to straighten up the work bench too!
r


Some customer want the brake to be removable so they can shoot off the shooting bench without recoil and remove for hunting. If this is the case make a tool to fit the holes in the brake so they won’t deform the brake with a screwdriver trying to stick it in the holes. Remember if it looks ugly a year later and somebody ask who put it on the answer will be that gunsmith down the street without the explanation that it was damage by an ignorant attempt to remove or tighten. I also make a threaded knurled blank to screw on when the brake is removed to protect those beautiful threads. If the installation is permanent I use medium Loctite to secure.

With the brake tightened securely we can turn the outside to the same diameter as the barrel or taper slightly for a beautiful job. If the barrel is blue steel I caution the customer that the job may require bluing to achieve a good job. You can try but you can’t guarantee that you won’t leave marks on the bluing when you tighten the barrel in the lathe chuck. Use soft shims and be careful but if you scratch the barrel and you have to reblue for free you will basically lose money on the job unless you can do a satisfactory job with touch up. If the barrel is stainless make sure the brake is stainless and blend it all together with a nice wire wheel finish. It looks great.


Blueprinting

Blueprinting Rifle Actions


You might have heard the term and have some idea what the term means but don’t despair if you are in the dark. It isn’t any harder than woodpecker lips and maybe this will clear up some of the confusion.

Once you have that ultimate rifle barrel in hand that took 6 months longer than you thought for it to arrive you realize that a lot has to be done for it to shoot to its full potential. The machinist has struggled to make a rifled tube that is straight and consistent within .001 inch from end to end. Now it’s up to the gunsmith to do his part. This consist of cutting a chamber exactly in line with this bore and then making sure the action that will be behind this cartridge will be exactly in line with the bore and chamber. If anything is not either perpendicular or in line and parallel with the centerline established by the bore when the cartridge fires and pushes back against the bolt face forces will be transmitted angular to the center and result in pushing the barrel off center. This push will in the form of uneven barrel vibrations. Blueprinting an action is simply making every surface either in line or perpendicular (90 degrees) to the center line.

When we chambered our barrel we took great pains to center this barrel in the lathe. If possible we centered it on both ends within .0005 (1/2 thousandths). Then we cut the threads so we know whatever receiver we screw this barrel into that the chamber will be centered. So our first task is to find the center of the receiver. A few accessories come to our aid in this task. The first is an action mandrel. A mandrel is a device for holding work in a lathe. It has a long straight shaft that is turned to fit the center of the action where the bolt rides. It should fit within .001 and slide on without binding. Then it should have a threaded section that is threaded for a class A fit in the receiver threads. This mandrel will be turned outside the threaded section for maybe 2 inches and have center holes drilled in each end. This is important because if the mandrel can be screwed into the receiver with the short end but binds when you slide the long end into the receiver you know the receiver threads are the correct size but not centered in the receiver. This can be corrected by mounting the receiver in the lathe and threading on center. This is a very advanced operation and should only be attempted by an experienced operator. Another option is to use the action tap which looks like the mandrel but is really a tap with a long pilot that rides in the bolt track and cut threads square with the bolt. These taps come in standard and .010 oversize. If this tap is used the action will no longer accept a standard barrel so this is a big deciBlueprinting Rifle Actions


You might have heard the term and have some idea what the term means but don’t despair if you are in the dark. It isn’t any harder than woodpecker lips and maybe this will clear up some of the confusion.

Once you have that ultimate rifle barrel in hand that took 6 months longer than you thought for it to arrive you realize that a lot has to be done for it to shoot to its full potential. The machinist has struggled to make a rifled tube that is straight and consistent within .001 inch from end to end. Now it’s up to the gunsmith to do his part. This consist of cutting a chamber exactly in line with this bore and then making sure the action that will be behind this cartridge will be exactly in line with the bore and chamber. If anything is not either perpendicular or in line and parallel with the centerline established by the bore when the cartridge fires and pushes back against the bolt face forces will be transmitted angular to the center and result in pushing the barrel off center. This push will in the form of uneven barrel vibrations. Blueprinting an action is simply making every surface either in line or perpendicular (90 degrees) to the center line.

When we chambered our barrel we took great pains to center this barrel in the lathe. If possible we centered it on both ends within .0005 (1/2 thousandths). Then we cut the threads so we know whatever receiver we screw this barrel into that the chamber will be centered. So our first task is to find the center of the receiver. A few accessories come to our aid in this task. The first is an action mandrel. A mandrel is a device for holding work in a lathe. It has a long straight shaft that is turned to fit the center of the action where the bolt rides. It should fit within .001 and slide on without binding. Then it should have a threaded section that is threaded for a class A fit in the receiver threads. This mandrel will be turned outside the threaded section for maybe 2 inches and have center holes drilled in each end. This is important because if the mandrel can be screwed into the receiver with the short end but binds when you slide the long end into the receiver you know the receiver threads are the correct size but not centered in the receiver. This can be corrected by mounting the receiver in the lathe and threading on center. This is a very advanced operation and should only be attempted by an experienced operator. Another option is to use the action tap which looks like the mandrel but is really a tap with a long pilot that rides in the bolt track and cut threads square with the bolt. These taps come in standard and .010 oversize. If this tap is used the action will no longer accept a standard barrel so this is a big decision. The advantage is the threads will be concentric and not a little egg shaped from the tap only cutting out the tight spot.

Figure 10 Rethreaded and lug seats cut flat and square. Next step is to cut the action face square.

A Winchester 70 rethreaded and blueprinted

Figure 11 Using the tap for a mandrel and facing off the receiver mounted between centers in the lathe

Truing the action face between centers

Now our action has threads square with the center and we can proceed to cut the rest while the action is mounted on the mandrel and turned between centers. This is a quick operation and actually easier to cut than to check so I usually cut the front of the receiver with a facing tool only until it cleans up all the way around. If the bolt lug don’t show evidence of full contact with the seats in the receiver the bolt will be lapped in until machinist layout ink will be rubbed off both lugs when the bolt is worked in the action. If the lugs are too far out of contact (rare) the bolt can be mounted in the chuck and steady rest and the back of the lugs squared with a facing tool. Then they should be lapped and checked. The bolt lug seats in the receiver can also be squared in the lathe or with a lapping tool and lapping compound.

Now we have most of the receiver square and only have one more surface in the receiver to square. This is the bolt face. With the bolt closed and in firing position the bolt lapping tool can be screwed into the receiver and the bolt face lapped until it shows no sign of uneven contact. This tool can be made from an old cut off barrel bored out square with the threads for a 3/4 inch shaft mounted with a brass tip turned the diameter of the bolt face. All tolerances should be zero or close as possible. Of course you buy a tool from Brownells but that’s too easy.

Now the receiver face, bolt face, bolt lugs, bolt lug seats and threads are all square. But if you put it together without checking the recoil lug it might all be for nothing. If the lug is thicker on one side than the other it will push the barrel off center when it is tightened. The options are buying a replacement lug that is thicker and surface ground completely flat or grinding the lug you have on a surface grinder until flat. If the action was threaded with that oversize tap you will also have to open up the recoil lug so the barrel threads will go through without damage.

Now your action is ready to be fitted with that barrel. Obviously this work has to be finished before threading and chambering the barrel because most of these operations affect headspace. Cutting the receiver face and grinding the lug tighten headspace and squaring the bolt lugs, lug seats and bolt face will increase headspace. Of course the thread corrections have to be completed in the receiver first because the receiver is the “go” gauge for the barrel threads.

Work carefully and understand each operation and know your desired outcome. If there was ever a time to Do Good Work” this is it.


Headspace


What is Headspace and why is it important?

Headspace is the amount of space in the chamber from the face of the bolt when it is locked in firing position to whatever stops a cartridge when it is dropped into the chamber. Actually what concerns us the most is the amount of space that is left when a loaded round is in the chamber. In an ideal world the cartridge will completely fill the chamber with no space but have no interference. This is not an ideal world so we have to have room for variations in ammo and dirt and powder fouling. We do this by having a minimum (go) and a maximum (no go) usually this range is .004 inch. We want to have no more space than a human hair so this is a job to be done with care and knowledge.

So why is this so important? Consider what happens when the cartridge is fired. Once the bolt is closed the firing pin hit’s the primer with sufficient force to crush the metal cover and ignite the explosive charge of the primer. This also pushes the loaded cartridge as far forward in the chamber as it can go and increases the space between the bolt face and the base of the cartridge to the maximum. Next the flash comes through the flash hole and ignites the powder. Pressure quickly builds and the thin brass walls of the case seal off and prevent any gasses from flowing towards the bolt. As the pressure quickly climbs it forces the head of case rearward stretching the thin sides of the case until the case head rest against the bolt face. If the distance is excessive the case head will be blown off and the full pressure of the cartridge will be loosed into the action. Remember the shooters eye is only a few inches behind this area and his hands and arms are lying parallel to the action. We are talking 50,000 lbs. plus with normal rifle loads. SCUBA tanks and welding cylinder have less than 3,000 so you get the idea.
But what if it just stretches the case but not enough to rupture? This is bad too especially for the reloader. This case is stretched thin just above the case head. When the reloader resizes he will push the shoulder back and the case will chamber again but the brass is already thin in this area just above the case head and when fired again the process repeats but maybe this time the thin area ruptures. If not this time maybe the third or fourth or sometime down the line. Also pushing that shoulder back each time usually shows up as a longer case neck needing to be trimmed and deburred.

All this shifting of the cartridge during firing also results in poor ignition of the powder and inconsistent accuracy as the bullet has a hard time getting started into the rifling straight. Misfires often result from the cartridge being pushed away from the firing pin.

But what happens if there is not enough room? Most firearms have built in safety mechanisms to prevent the gun from firing if the bolt is not fully locked in firing position. This is the scenario that insufficient headspace presents. The bolt face touches the case head before closing completely and when the trigger is pulled the shooter hears a click but it doesn’t fire. Many times a gun brought in for a new firing pin or a good cleaning when the real problem will be insufficient headspace.

So how do you measure headspace? The space to be measured is enclosed and out of sight so normal methods won’t work. Headspace gauges to the rescue. These are precision ground gauges that fit the area between the bolt face and whatever the cartridge comes to rest against. Most common are the family of rimless bottleneck cartridges. These include the 223, 308 and 3006 family of cartridges. Many times headspace gauges will work for a whole family of cartridges. The 3006 gauges will work for 2506, 270 Winchester, 8mm06, 35 Whelen, and 400 Whelen. 308 gauges handle 243 Winchester, 260 Remington, 7mm/08 and 358 Winchester. These cartridges and many others do not have a rim that projects outward past the case wall and rest on the bottleneck shoulder. The next type is the belted magnum. This type has a belt on the outside of the case just above the groove cut for the rim. This type headspaces like the rimmed case. The gauge measures only the distance from bolt face to rim. These types include 7mm Remington Mag, 300 Winchester, etc.

Next are the rimmed cases like 30-30, 303 British and 45-70. This gauge only measures rim thickness because that is what these cartridges rest upon even though some are bottleneck design. Last is the straight wall rimless that headspaces on the case mouth like 30 carbine and 45 ACP. Whatever the case type the gauges are used in the same way. First the chamber is cleaned of dirt or metal chips and then the go gauge is inserted. If the bolt will close without resistance the chamber is deep enough. Never try to force the bolt closed on the gauge because it is hardened steel and can damage chamber or bolt. Next remove the go and insert the no go gauge. This time when you try to close you should not be to close the bolt all the way. If you can, then the chamber is too deep for best performance. Next remove the no go and insert the field gauge and try to close. This gauge is usually .004 larger than the no go and if the bolt will close the gun is unsafe and should not be fired.

How can headspace problems be corrected? Too little headspace is the best problem. Usually a reamer turned by hand will remove a couple of thousandths and get us where we need to be. If more than a small adjustment the barrel should be removed and set up in the lathe to keep the reamer on line with the bore. For excessive headspace the barrel must be removed and the barrel shoulder set back towards the muzzle to allow the chamber to move closer to the bolt face. On an average barrel with 16 threads to the inch one full turn will send the chamber .0625 inch towards the bolt. Of course the barrel will need to be machined back maintain clearance and not touch the bolt face.

But what if the chamber is correct and the ammo is too short or long? Very important to understand that excessive headspace or insufficient headspace is a relationship of chamber size and ammo size. The same problems of an oversize chamber will be present when we have undersize ammo. In the last year I have seen two nice 7mm Remington Magnum rifles badly damaged when they were loaded and fired with 270 Winchester ammo. When the case expanded to fit the chamber it required more stretch that the brass could survive and the case ruptured. This amount of pressure blew out the magazine boxes and broke the floor plates turning them into projectiles that injured one shooters leg.

Headspace is critical for safety, functioning and accuracy. Make sure you measure everything several times and understand what you are measuring. This is not a “poke and hope job”.


Remington 1100 and 11/87

Remington 1100 and 11-87


Every gunsmith needs to have a good understanding of these guns. For many years the Remington gas operated auto has been the gun of the masses and for good reason. Soft recoil, points well and reliable when properly maintained have been qualities that have endeared these guns to more than one generation. It didn’t hurt that the discount stores put them on sale at cost from time to time.
When it comes to repair this one is also a winner for the gunsmith. Available parts and easily disassembled make it a pleasure to service. Like most guns there are some areas that require close attention for best functioning. These are as follows.

Choke tubes– This applies to all shotguns with removable chokes. Remove, clean and apply a light coat of grease frequently. This is a very fine thread and at the first sign of rust the tube is permanent. Getting out stuck choke tubes is a real pain in the neck and you run the risk of ruining the barrel. You will find more information on this in the section on choke work.

Gas system– Gas piston seal and o ring should be clean and slide easily on the magazine tube. Many guns come in with these parts incorrectly installed by the owner after he cleaned it and reassembled incorrectly. Check the o-ring for nicks or cuts and replace if necessary. Leave this area clean and dry or use an oil that will not burn and turn to gum. I like mobile one synthetic oil ( like for the car!). It will turn black but stay slick and doesn’t dry or gum up. The 11-87 has the relief ports and spring that must be in place. Make sure the retainer is still in the forearm that sit atop the relief port spring.

Feed latch and interrupter– Looking in from the bottom with the barrel up the feed latch is on the left and the interrupter is on the right. The feed latch is operated by a bevel cut on the action bar and the interrupter by the disconnector on the trigger group. These parts must be in proper adjustment for the gun to feed shells from the magazine. Replace if worn or broken. The interrupter mounting stud can wear and the interrupter will have too much play. The retainer can be replaced with a thicker one from Brownells and remove this play. A lot easier and cheaper than sending back to the factory for a new interrupter stud to be installed.

Carrier and carrier latch– Sometimes bent by someone prying out a shell, if that is the case replace with a new one. If it is protruding below the action when viewed from the side expect this. It probably won’t lift the loaded round high enough to feed into the chamber. The carrier latch is located at the back of the carrier and is operated by a shell being released by the feed latch and striking the carrier latch. If it doesn’t hit hard enough the latch will not operate and the bolt will remain open. Problems in the magazine tube might show up here as a malfunction of the carrier latch. A weak, broken or jammed magazine spring will cause this. I see a lot of damaged magazine spring for hunters making a plug from a green stick in the field last year and the moisture from the stick caused the spring to rust. Another problem are the plastic followers. Dirt will embed into the sides making it hard for the follower to slide inside the magazine. Replacements are available made of stainless or aluminum and are a much better choice.

Bolt– Extractors break and can be replaced without disassembly. The firing pins break rarely but it does happen. More frequently the plastic buffer around the pins breaks and jams the pin or action. As always when you have a bolt in your hand inspect for cracks or unusual wear.

Mainspring– A problem area especially for the waterfowl hunters. Hunting in rain and salt water allows water to drain into the action spring tube and the spring will rust. Dirt and other debris along with oil also accumulates and the action of the bolt becomes sluggish. The mainspring tube nut will also become rusted in place and require an impact wrench and penetrating oil to break free. Coat the threads with grease anytime you have one of these disassembled for cleaning or repair.

Of course there are not any parts the customer can’t break, bend or lose. After you have repaired and cleaned several you will develop a feel for these guns by cycling the action and will know what needs to be done. Most of the time these guns can be repaired, cleaned or both in 30-45 minutes for an experienced gunsmith.